How To Guidelines in Environment
This page provides a comprehensive guide on managing environments in the Iron Fort Compliance system, including their setup, configuration, and hierarchical organization through nested environments.
Environment typically refers to a structured workspace or setting where applications, configurations, and resources are managed. It helps users categorize and organize different applications or systems based on their deployment type, such as:
- On-Premises Environment – For applications hosted on a company’s local servers.
- Cloud-Based Environment – For applications running on cloud platforms (SaaS, PaaS, IaaS).
- Hybrid Environment – A combination of both on-premises and cloud infrastructure.
Environment allow users to configure, test, and deploy applications efficiently while maintaining control over different setups. In your case, it seems like you're working on customizing environments for a government-related CRM demo.
-
How To: Register a new Environment
- Navigate to your organization’s Iron Fort Compliance login page
- Log in to Your Account
- Check your email for the One-Time Password (OTP) sent on your email and enter the OTP to proceed
- Once logged in, a welcome prompt will appear displaying
- Move your cursor to the left side of the dashboard to reveal the menu
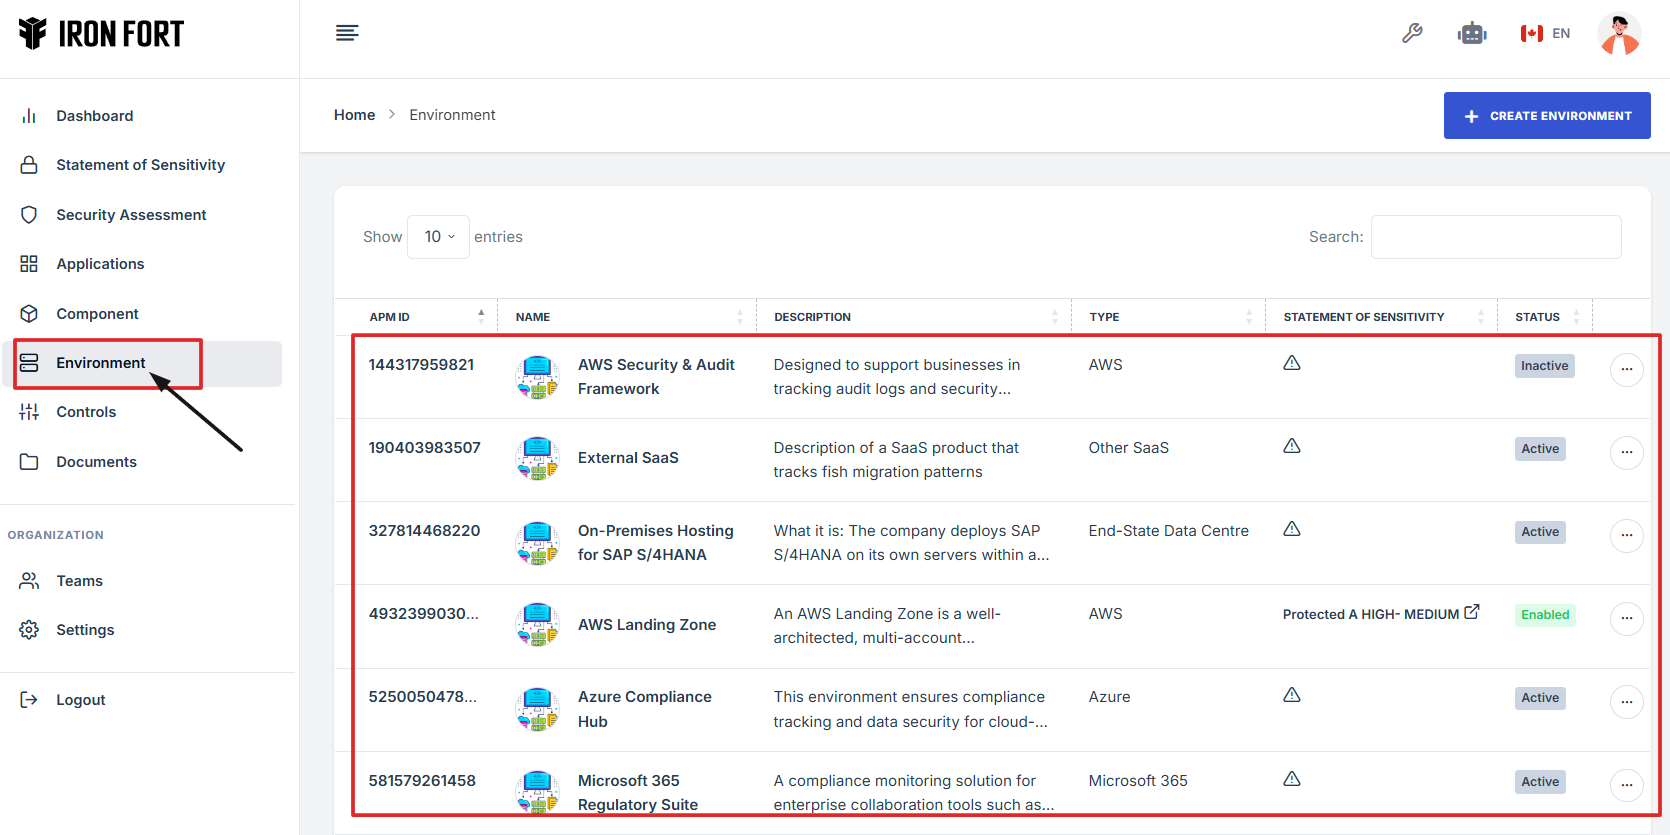
- Click the Environment tab on the dashboard.
- Click Create Environment to begin setting up a new environment.
- Click on the Environment Logo section.
- You have several options for attaching a logo
- Fill out the important details to complete the environment setup
- Save Your Changes
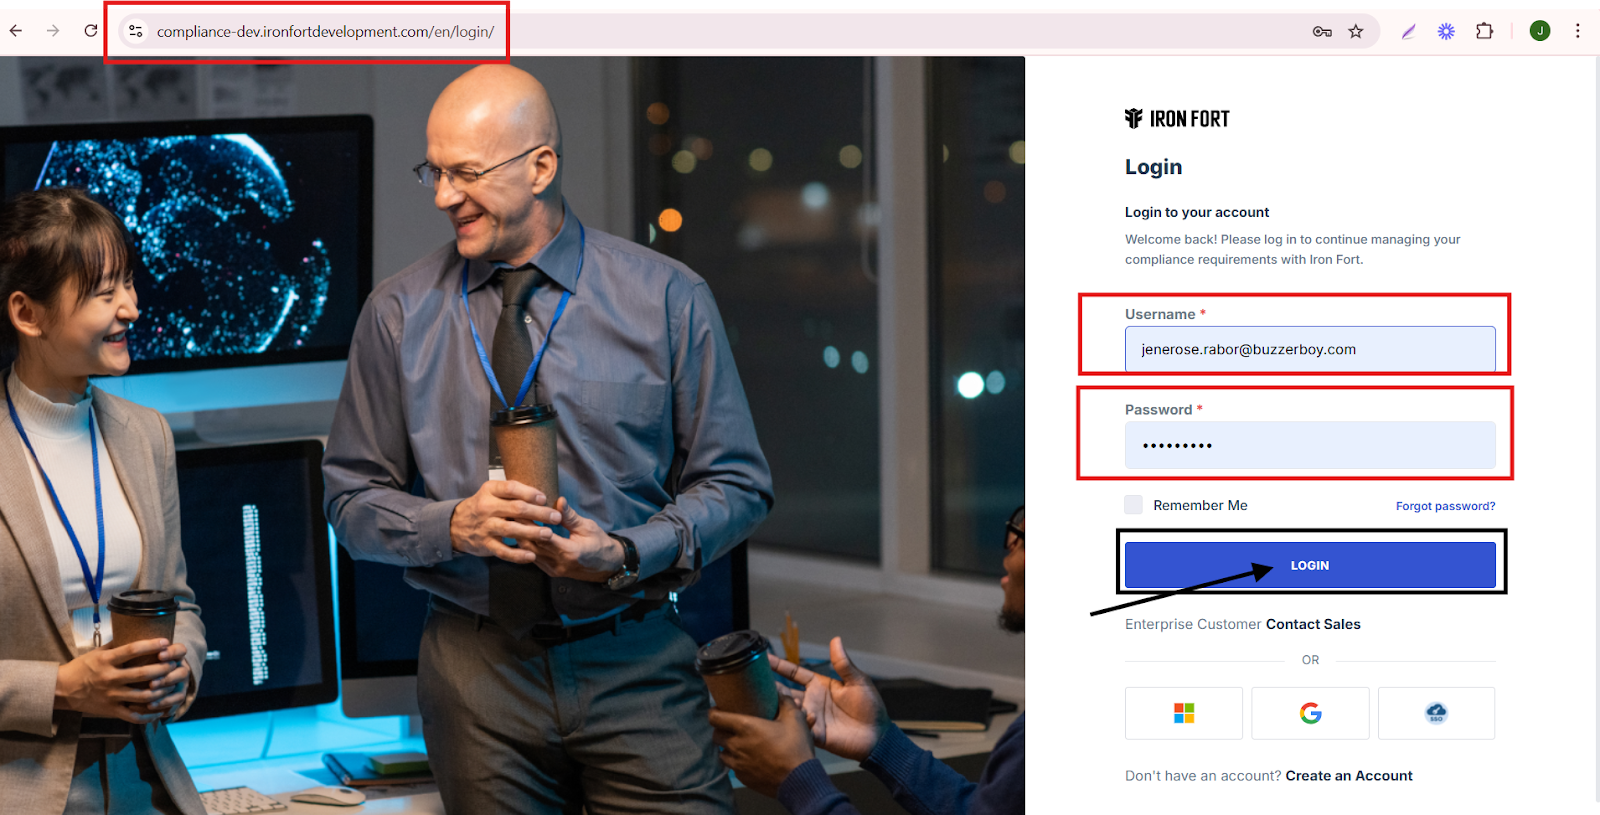
1. Navigate to your organization’s Iron Fort Compliance login page
For example: https://compliance-demo.ironfortdemos.com/en/login/?next=/en
2. Log in to Your Account
Enter your email and password to log in.
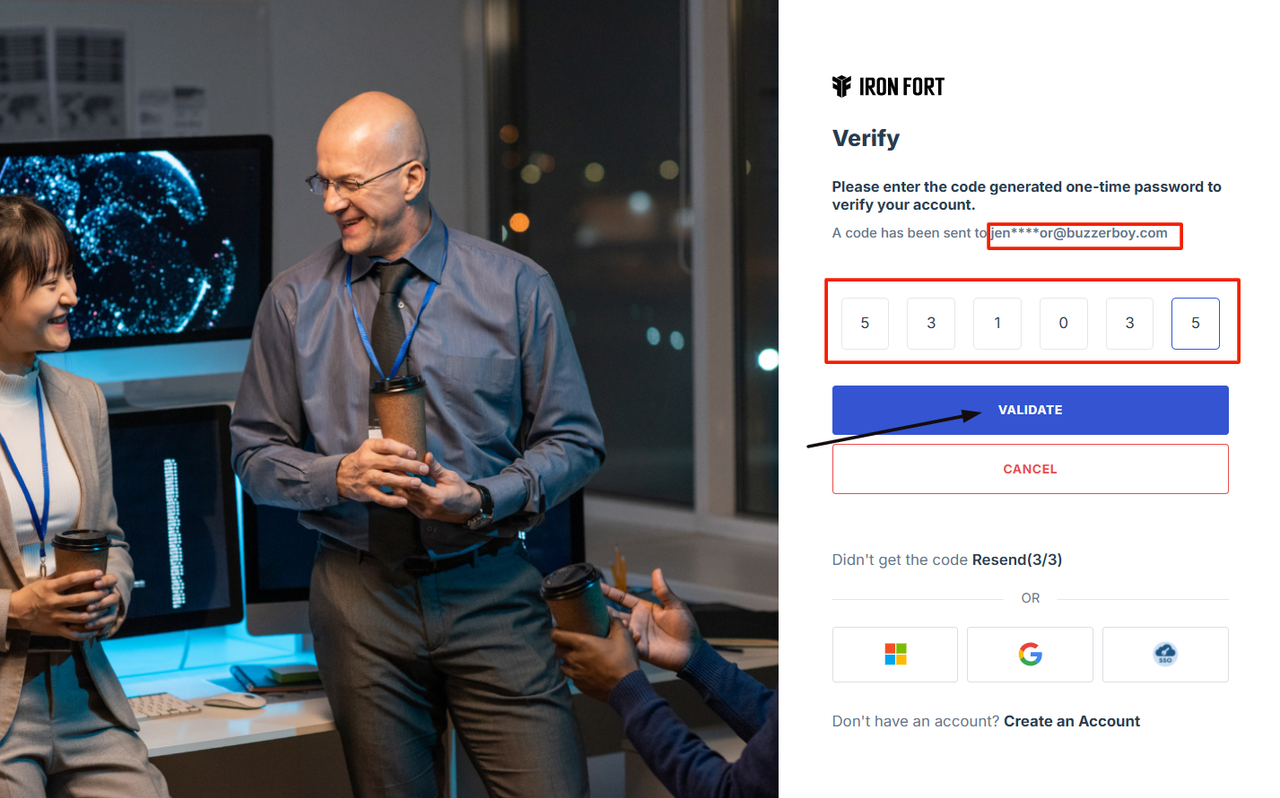
3. Check your email for the One-Time Password (OTP) sent on your email and enter the OTP to proceed.
4. Once logged in, a welcome prompt will appear displaying
-
Tenant Key Information: Verifying your system access
-
User Email: Your registered email for auditing purposes
-
Last Login Details: To track your previous access
-
Iron Fort Support Email: For any login issues or concerns
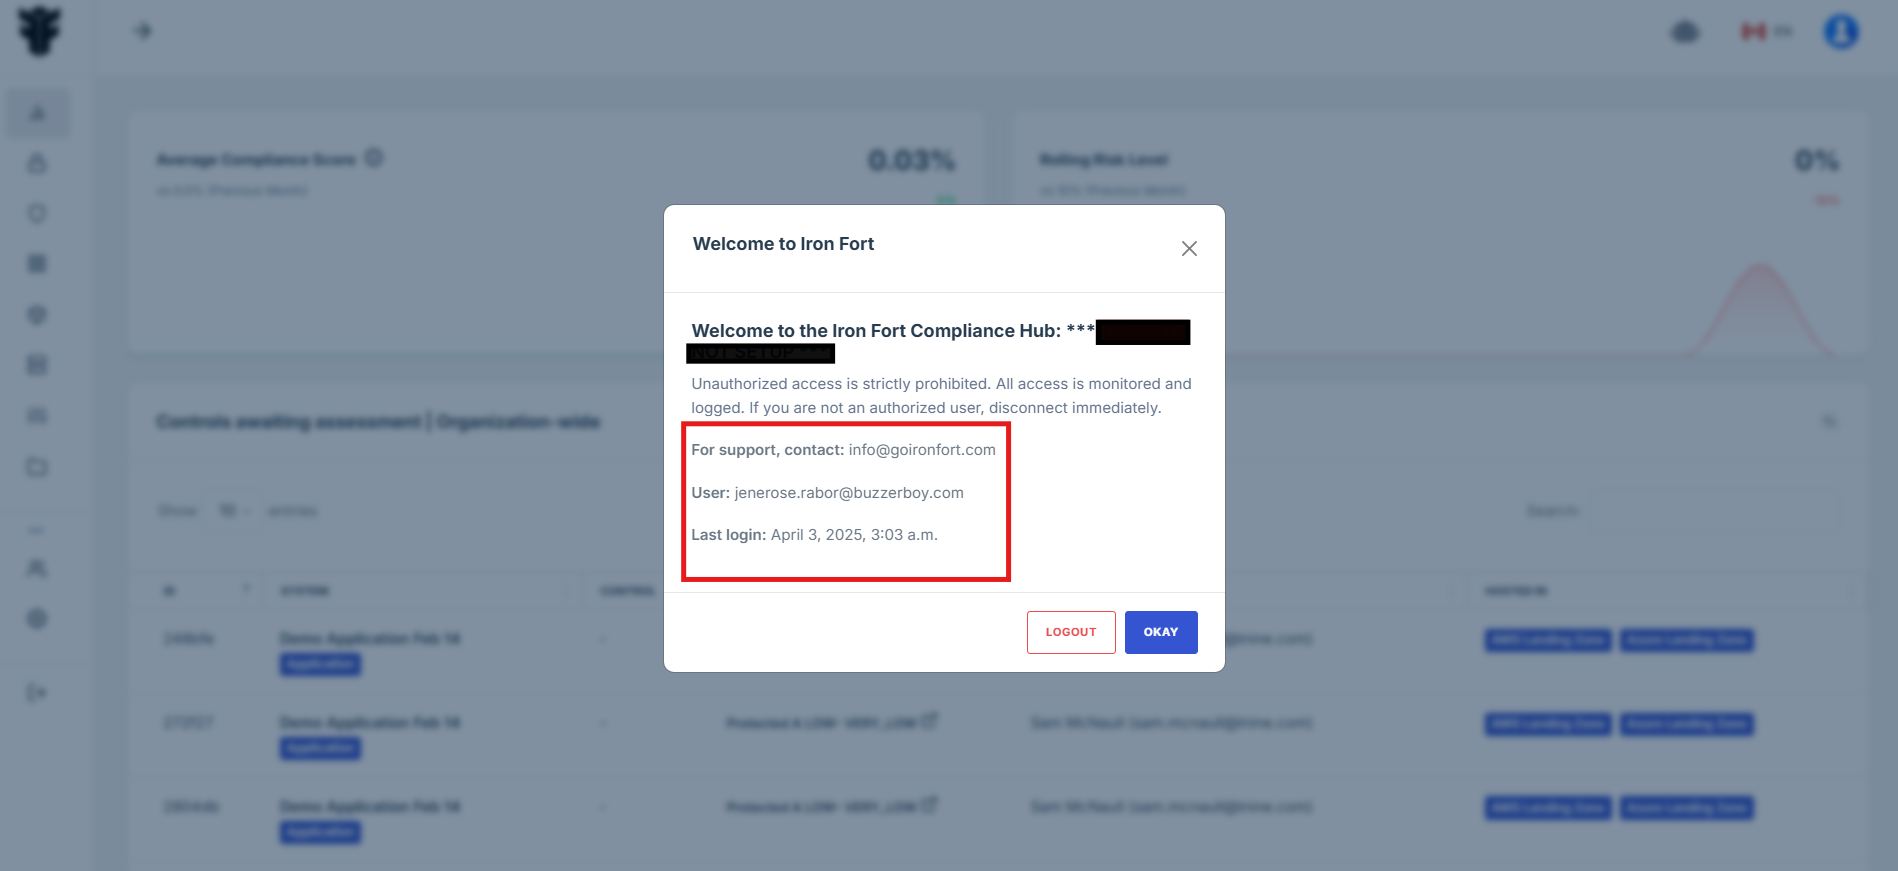
NOTE: If you recognize the details and are authorized, click "OK" to continue. However, if you are not an authorized user, click "Logout" immediately to exit.
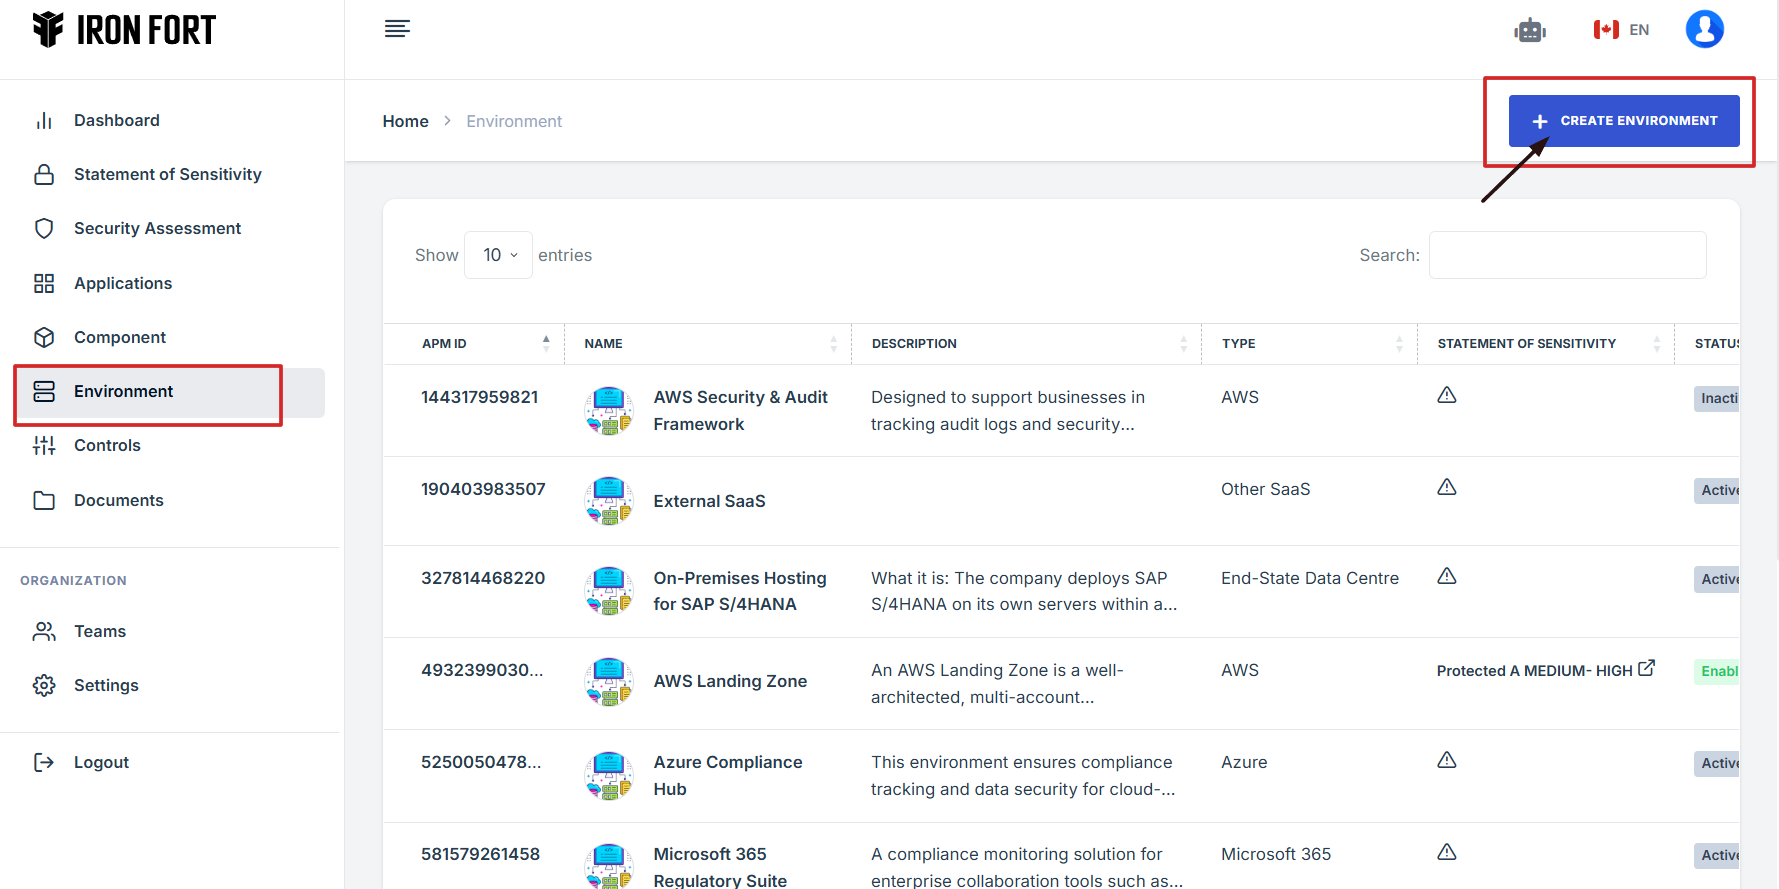
5. Move your cursor to the left side of the dashboard to reveal the menu.
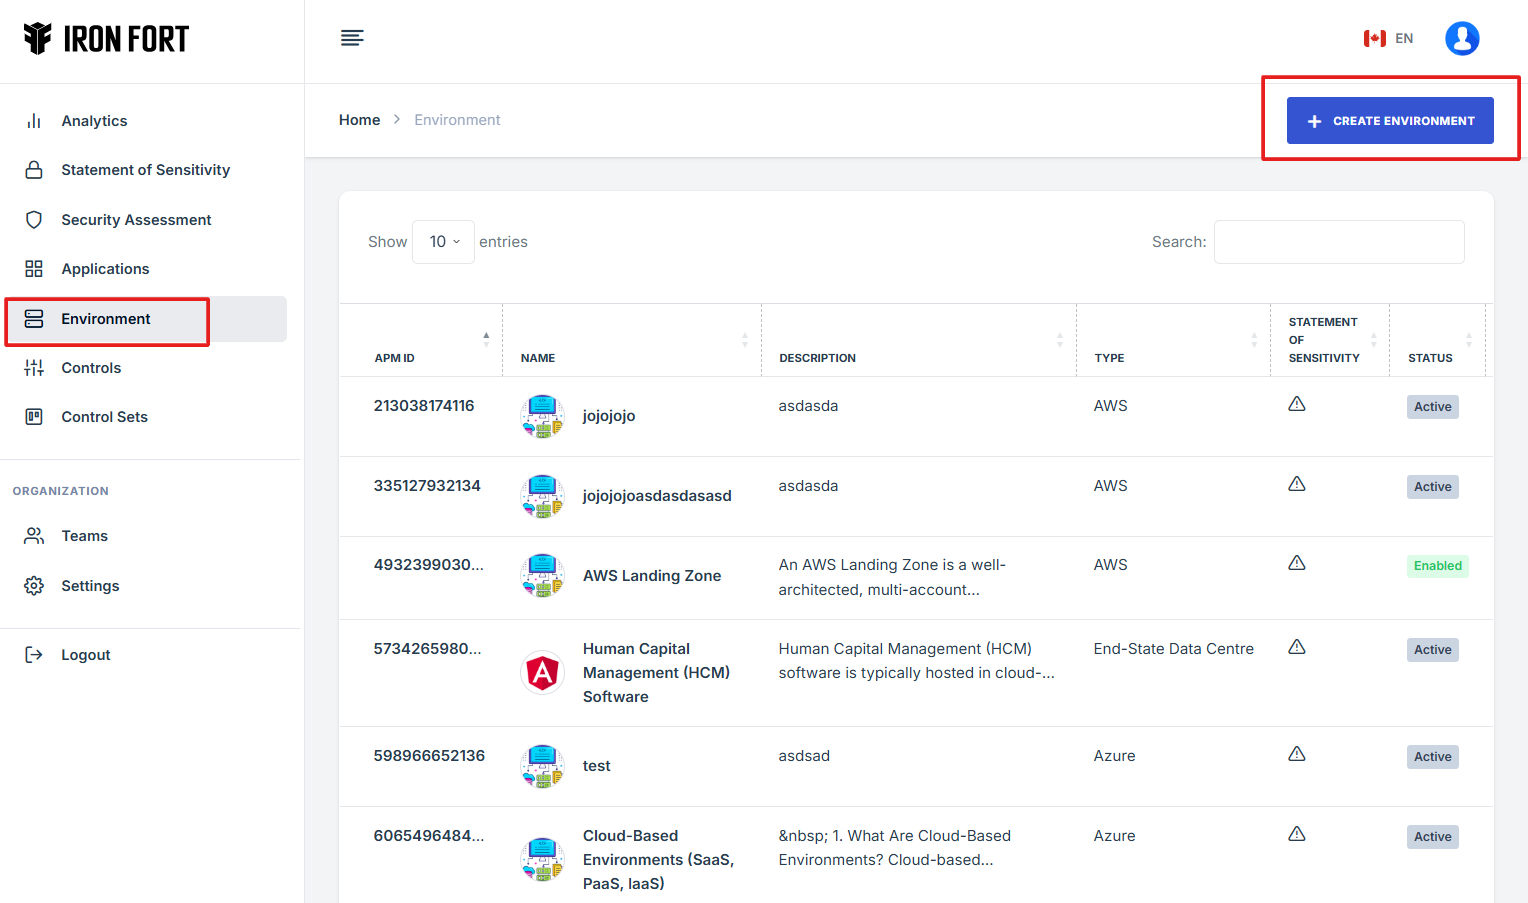
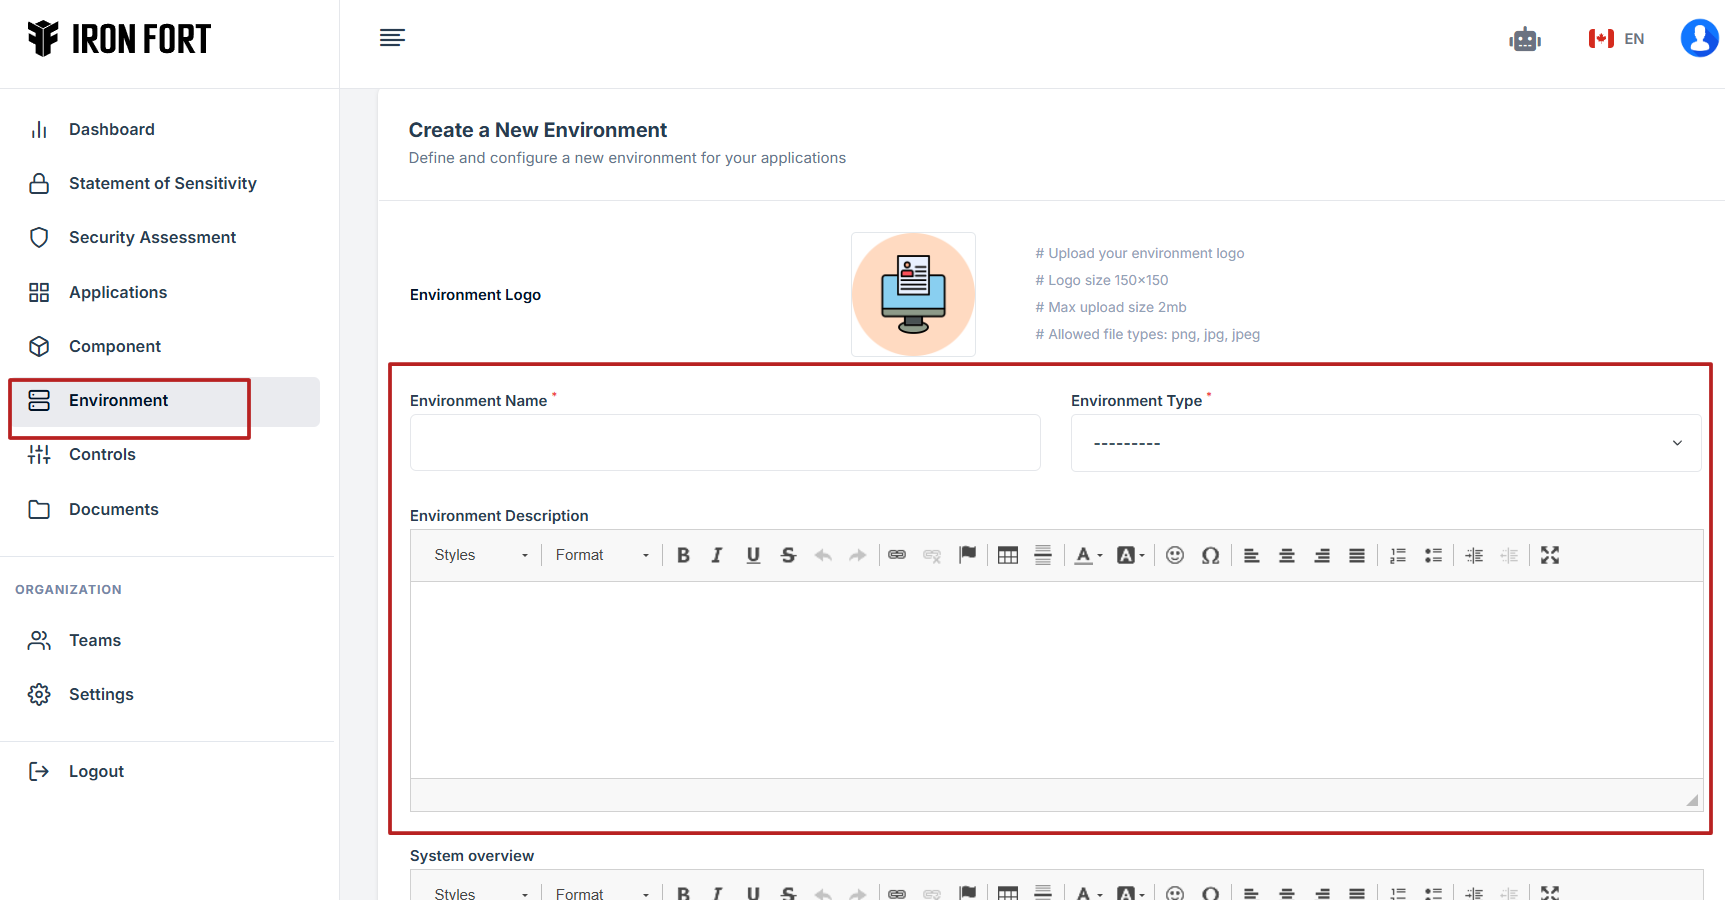
6. Click the Environment tab on the dashboard.
7. Click Create Environment to begin setting up a new environment.
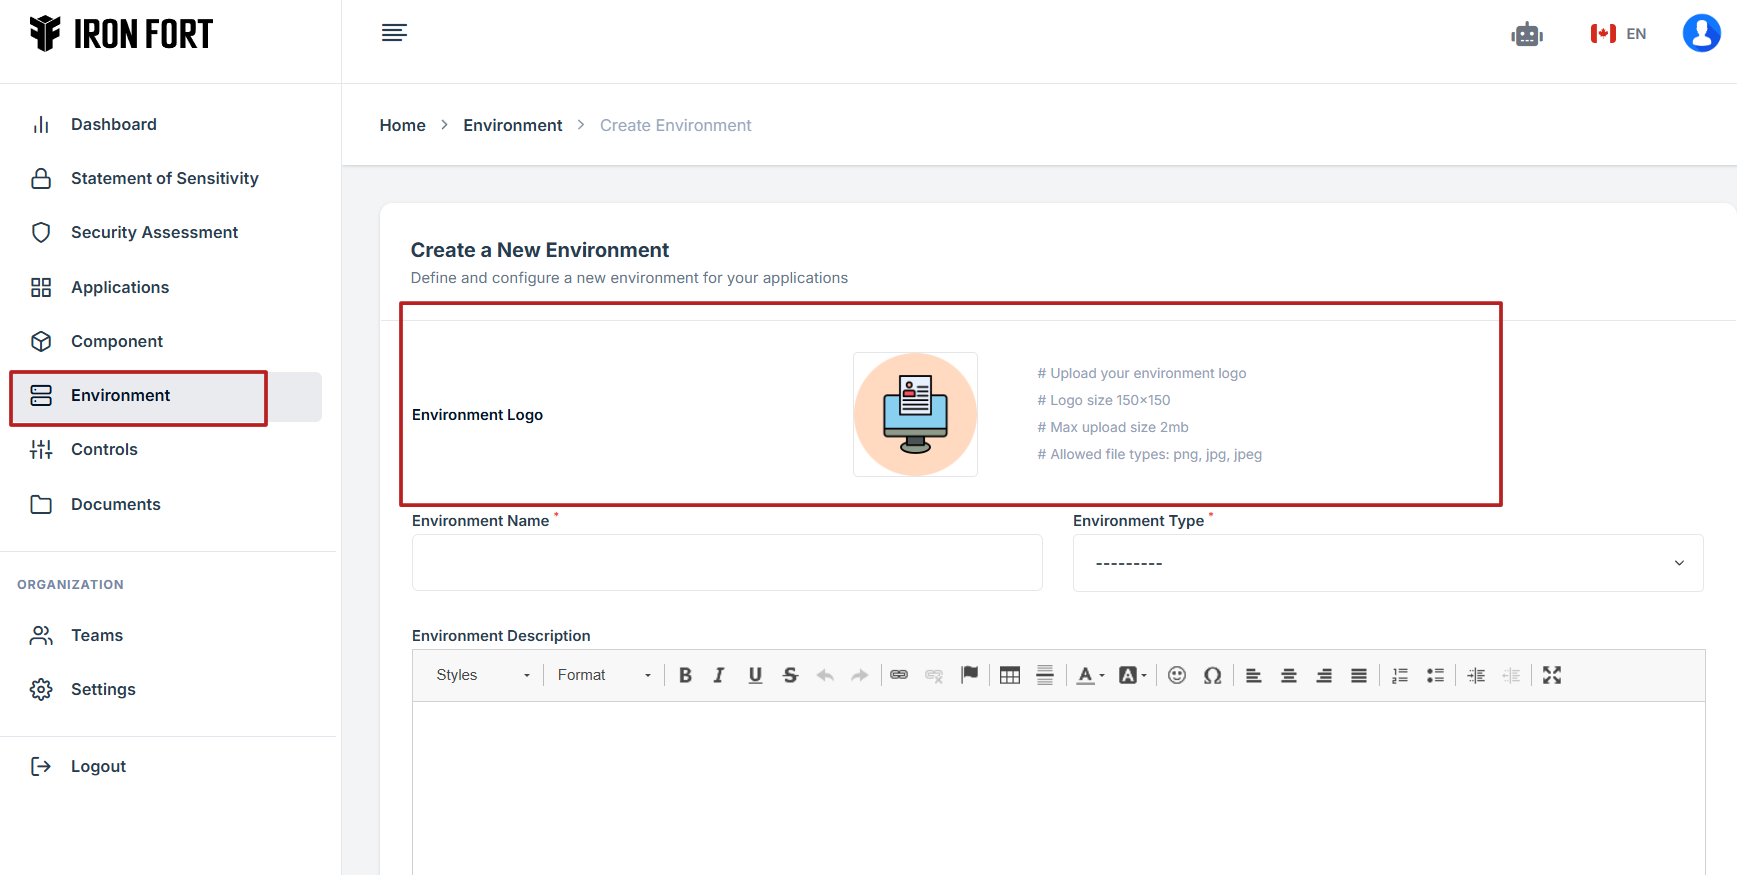
8. Click on the Environment Logo section.
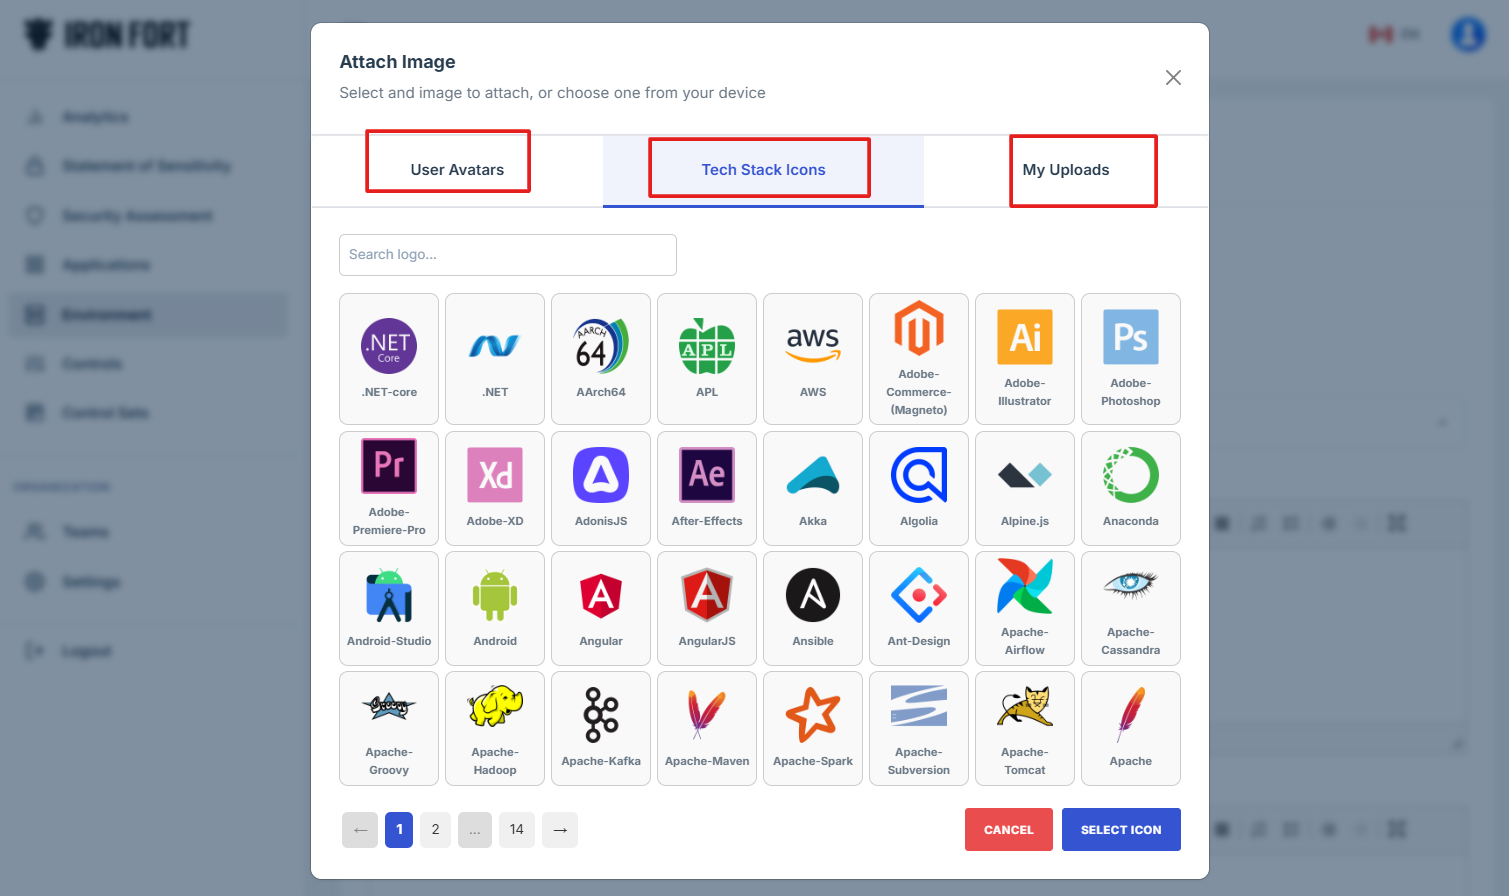
9. You have several options for attaching a logo:
- Use an Avatar: Select from a predefined avatar to represent your environment.
- Use Stack Items: Choose from system-generated icons available in Iron Fort.
- Upload Your Own Logo: Click the upload button to add a custom logo that best represents your application.
10. Fill out the important details to complete the environment setup:
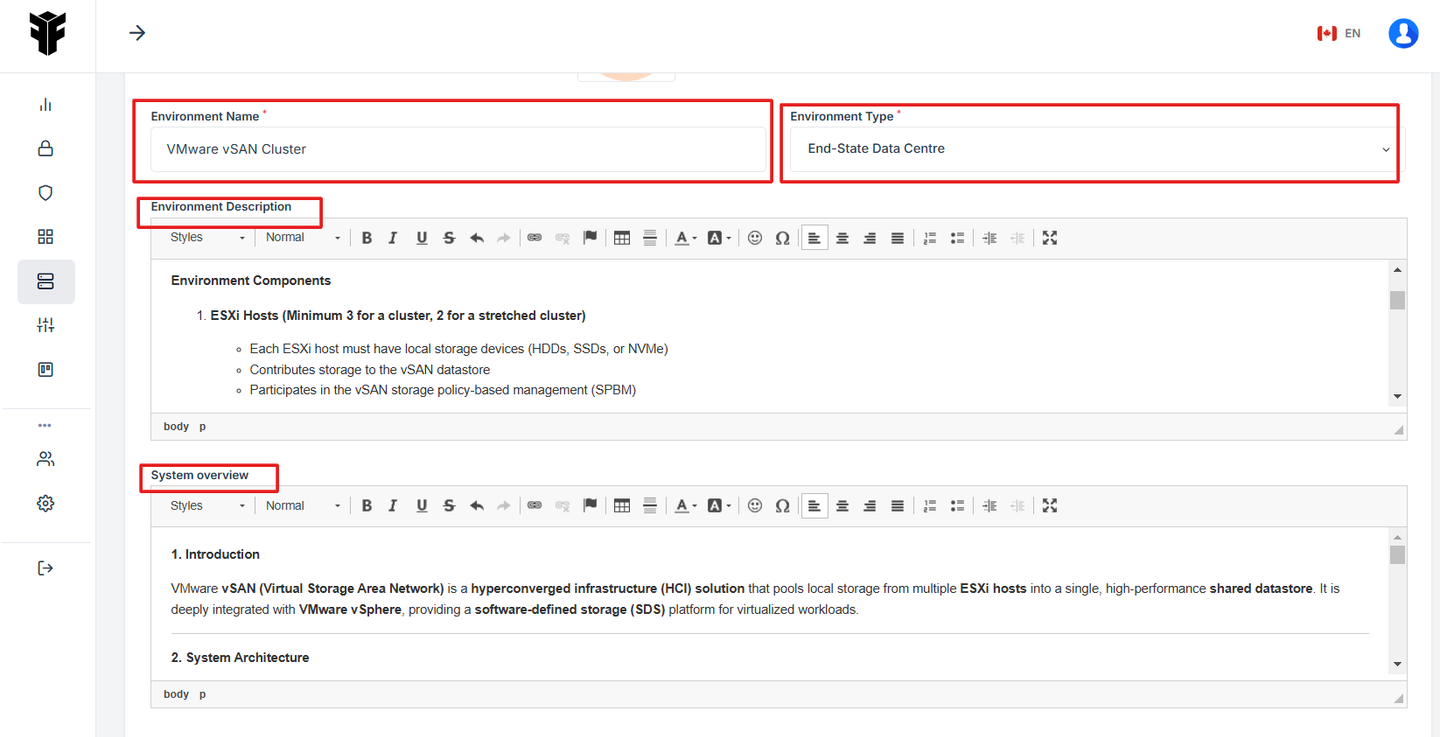
- Environment Name - Enter a descriptive name for your environment.
- Environment Type - Specify the type of environment.
- Environment Description - Provide a brief summary of what this environment is intended for.
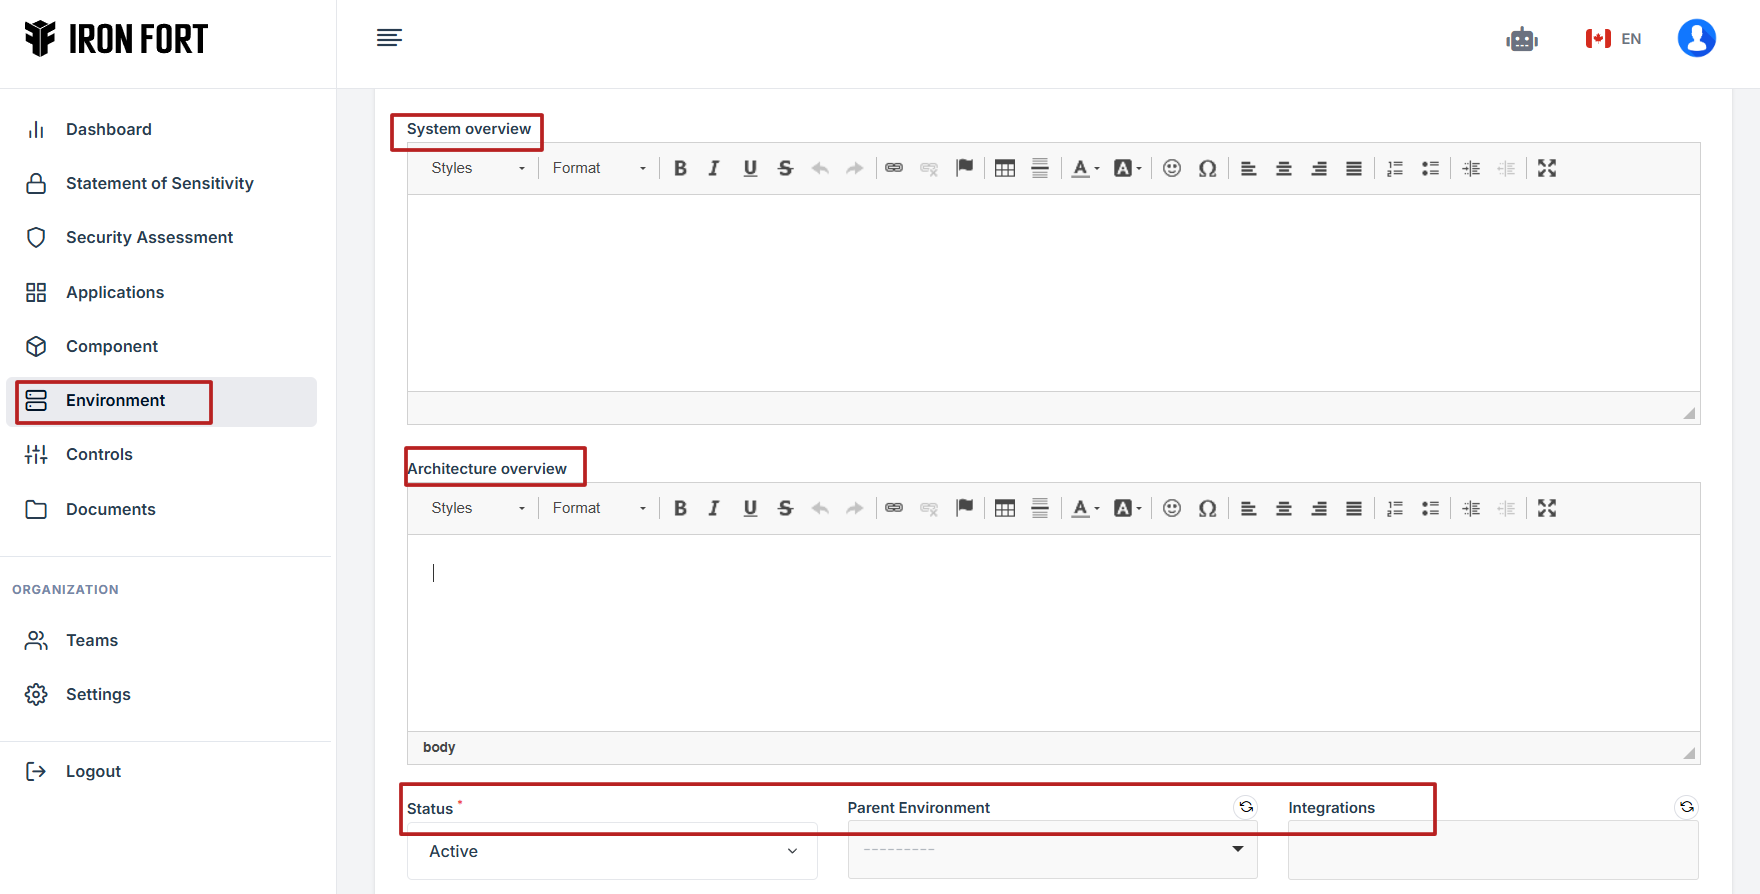
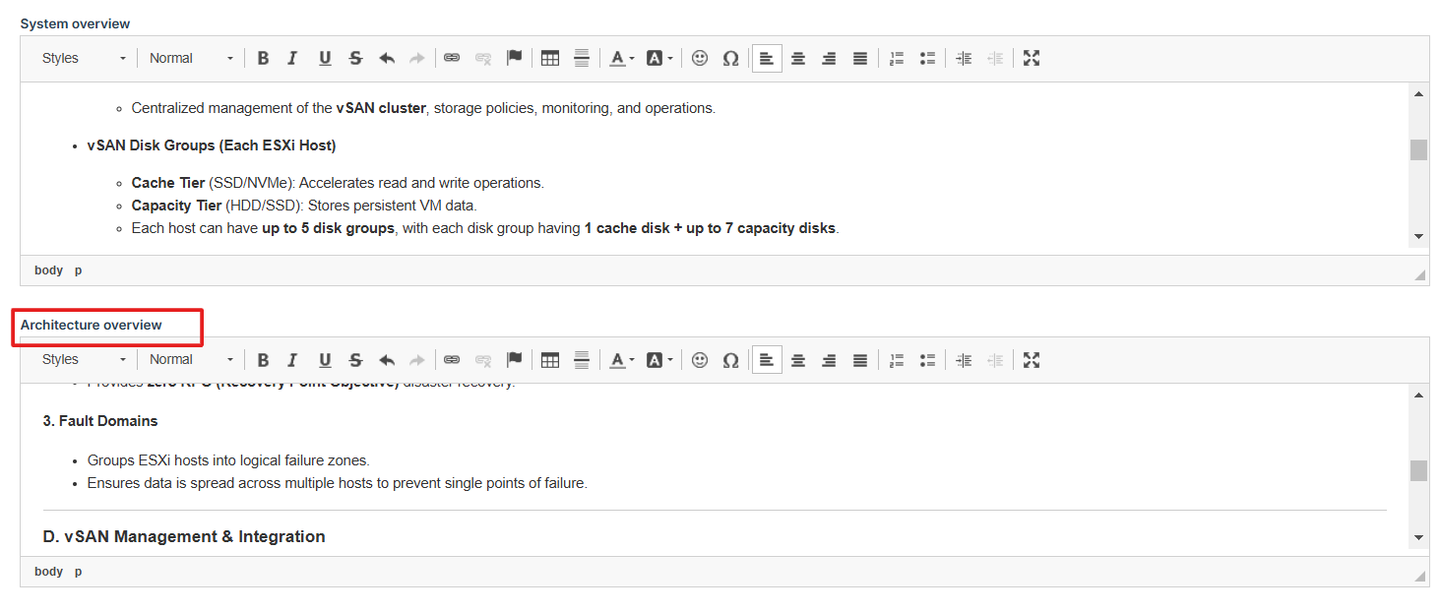
- System overview - Describe the key functionalities and purpose of the environment.
- Architecture overview - Outline the technical structure of the environment.
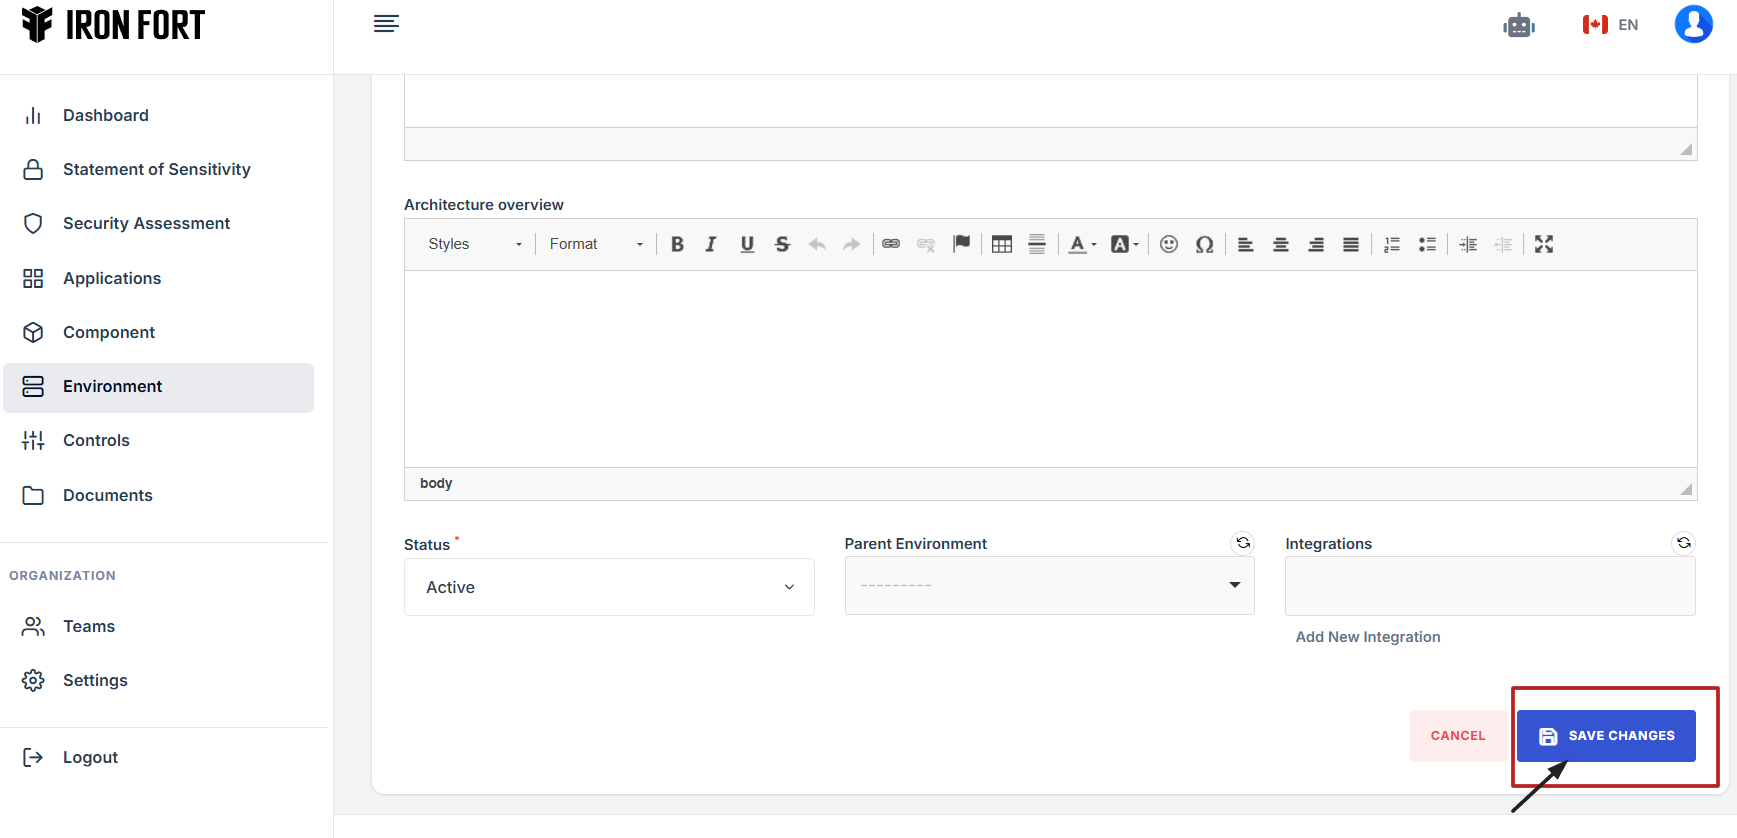
- Status - Indicate the current operational state of the environment.
- Parent Environment - Specify the larger or main environment this environment is associated with, if applicable.
- Integration - Describe any external systems or services this environment is connected to for data sharing or functional integration.
11. Save Your Changes: Click Save to confirm and apply your updates.
Nested Environment refers to an environment structured within another environment, allowing for hierarchical organization and management of different setups. This feature is useful for handling complex deployments, where different layers or sub-environments need to be managed under a primary environment.
- Multi-Tier Deployments – Organizing environments into parent-child relationships, such as
Production → Staging → Development setups. - Role-Based Access – Assigning specific access levels to different nested environments within an organization.
- Modular Configurations – Managing related but distinct configurations under a broader environment category (e.g., different departments or projects under a corporate umbrella).
- Testing & Validation – Creating isolated sub-environments for testing without affecting the primary environment.
In your government-focused CRM demo, this could be helpful for structuring different agency environments while keeping configurations aligned under a main government setup.
-
How To: Add a Nested Environment
- Navigate to your organization’s Iron Fort Compliance login page
- Log in to Your Account
- Check your email for the One-Time Password (OTP) sent on your email and enter the OTP to proceed
- Once logged in, a welcome prompt will appear displaying
- Move your cursor to the left side of the dashboard to reveal the menu
- Click on Environment from the menu
- Click Create Environment to begin setting up a nested environment under your normal environment
- In this case, you will be prompted to enter details for the nested environment
- Fill Out Nested Environment Details
- Ensure the status is set to Active to indicate that the environment is ready for use
- The parent environment should be correctly selected from the previously created normal environment
- Click “Save”: Finalize the creation process
- Verify the Nested Environment in the Environment Section from reviewing the list of environments displayed on the dashboard
1. Navigate to your organization’s Iron Fort Compliance login page
For example: https://compliance-demo.ironfortdemos.com/en/login/?next=/en
2. Log in to Your Account
Enter your email and password to log in.
3. Check your email for the One-Time Password (OTP) sent on your email and enter the OTP to proceed.
4. Once logged in, a welcome prompt will appear displaying
-
Tenant Key Information: Verifying your system access
-
User Email: Your registered email for auditing purposes
-
Last Login Details: To track your previous access
-
Iron Fort Support Email: For any login issues or concerns
NOTE: If you recognize the details and are authorized, click "OK" to continue. However, if you are not an authorized user, click "Logout" immediately to exit.
5. Move your cursor to the left side of the dashboard to reveal the menu.
6. Click the Environment tab on the dashboard
7. Click Create Environment to begin setting up a nested environment under your normal environment
8. In this case, you will be prompted to enter details for the nested environment.
9. Fill Out Nested Environment Details:
Nested Environment Name: Enter a name that reflects its specialized role
Environment Type: Define its type of nested environment.
Environment Description: Provide a clear description detailing how this nested environment differs or supports the parent environment.
System Overview: Briefly describe the system functions of the nested environment.
Architecture Overview: Outline the nested system’s technical setup, such as its integration with the parent environment’s infrastructure while offering dedicated security protocols or API endpoints.
10. Ensure the status is set to Active to indicate that the environment is ready for use.
11. The parent environment should be correctly selected from the previously created normal environment.

12. Click “Save”: Finalize the creation process.
13. Verify the Nested Environment in the Environment Section from reviewing the list of environments displayed on the dashboard.

-
How To: Add an Environment
- Navigate to your organization’s Iron Fort Compliance login page
- Log in to Your Account
- Check your email for the One-Time Password (OTP) sent on your email and enter the OTP to proceed
- Once logged in, a welcome prompt will appear displaying
- Move your cursor to the left side of the dashboard to display the menu
- Click the Environment tab on the dashboard.
- Click Create Environment to begin setting up a new environment.
- Click on the Environment Logo section.
- You have several options for attaching a logo
- Fill out the important details to complete the environment setup
- Save Your Changes
1. Navigate to your organization’s Iron Fort Compliance login page
For example: https://compliance-demo.ironfortdemos.com/en/login/?next=/en
2. Log in to Your Account
Enter your email and password to log in.
3. Check your email for the One-Time Password (OTP) sent on your email and enter the OTP to proceed.
4. Once logged in, a welcome prompt will appear displaying
-
Tenant Key Information: Verifying your system access
-
User Email: Your registered email for auditing purposes
-
Last Login Details: To track your previous access
-
Iron Fort Support Email: For any login issues or concerns
NOTE: If you recognize the details and are authorized, click "OK" to continue. However, if you are not an authorized user, click "Logout" immediately to exit.
5. Move your cursor to the left side of the dashboard to display the menu.
6. Click the Environment tab on the dashboard.
7. Click Create Environment to begin setting up a new environment.
8. Click on the Environment Logo section.
9. You have several options for attaching a logo:
- Use an Avatar: Select from a predefined avatar to represent your environment.
- Use Stack Items: Choose from system-generated icons available in Iron Fort.
- Upload Your Own Logo: Click the upload button to add a custom logo that best represents your application.
10. Fill out the important details to complete the environment setup:
- Environment Name - Enter a descriptive name for your environment.
- Environment Type - Specify the type of environment.
- Environment Description - Provide a brief summary of what this environment is intended for.
- System overview - Describe the key functionalities and purpose of the environment.
- Architecture overview - Outline the technical structure of the environment.
- Status – Indicate the current operational state of the environment.
- Parent Environment – Specify the larger or main environment this environment is associated with, if applicable.
- Integration – Describe any external systems or services this environment is connected to for data sharing or functional integration.
11. Save Your Changes: Click Save to confirm and apply your updates.
1. Log in to Iron fort: How To: Login
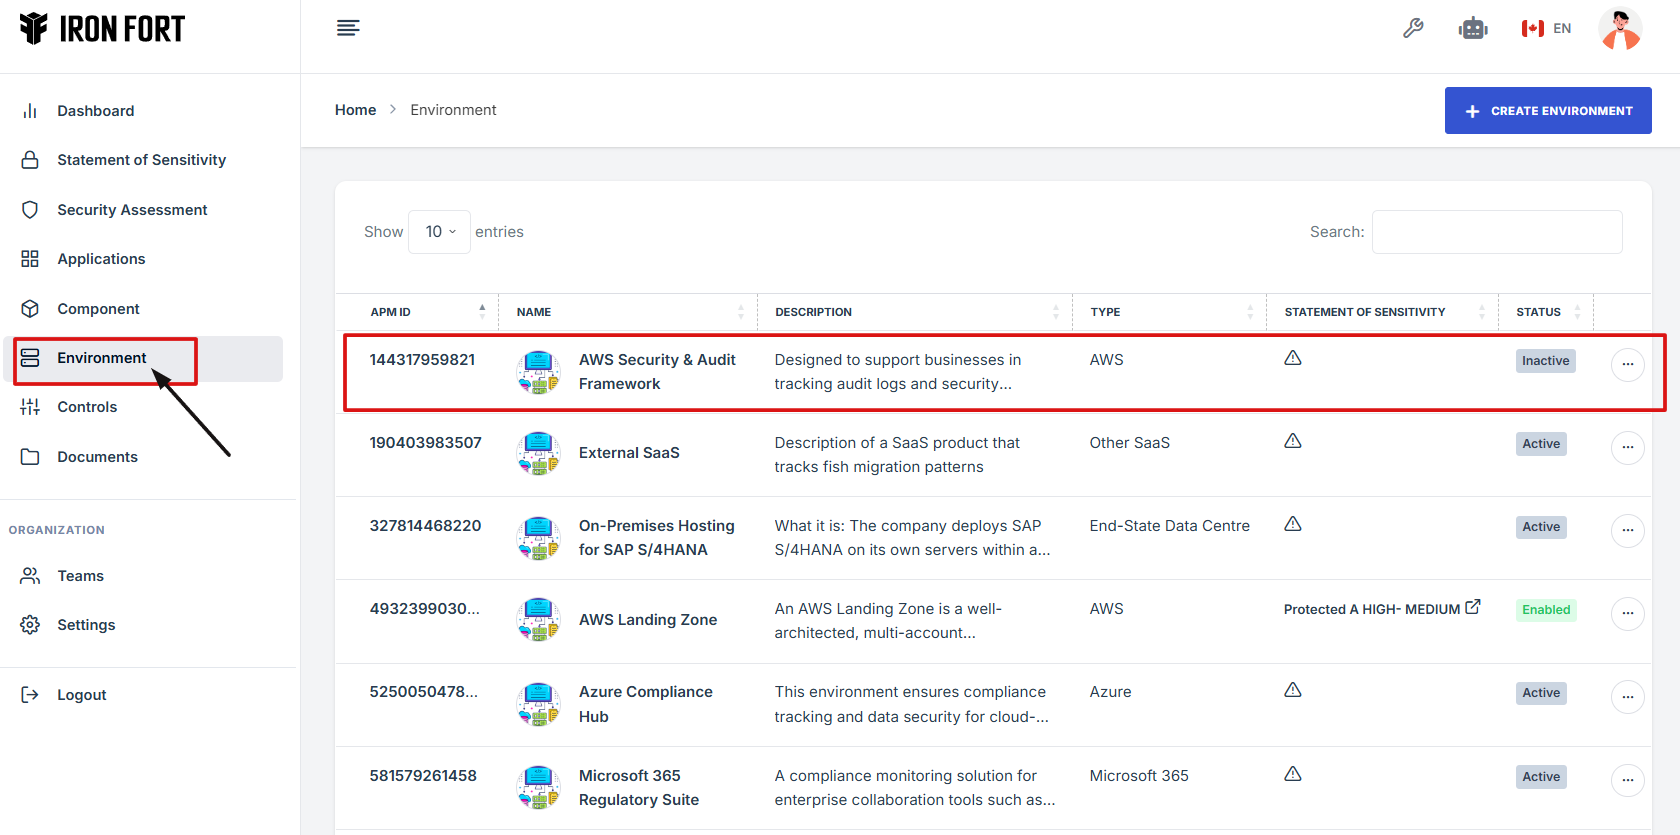
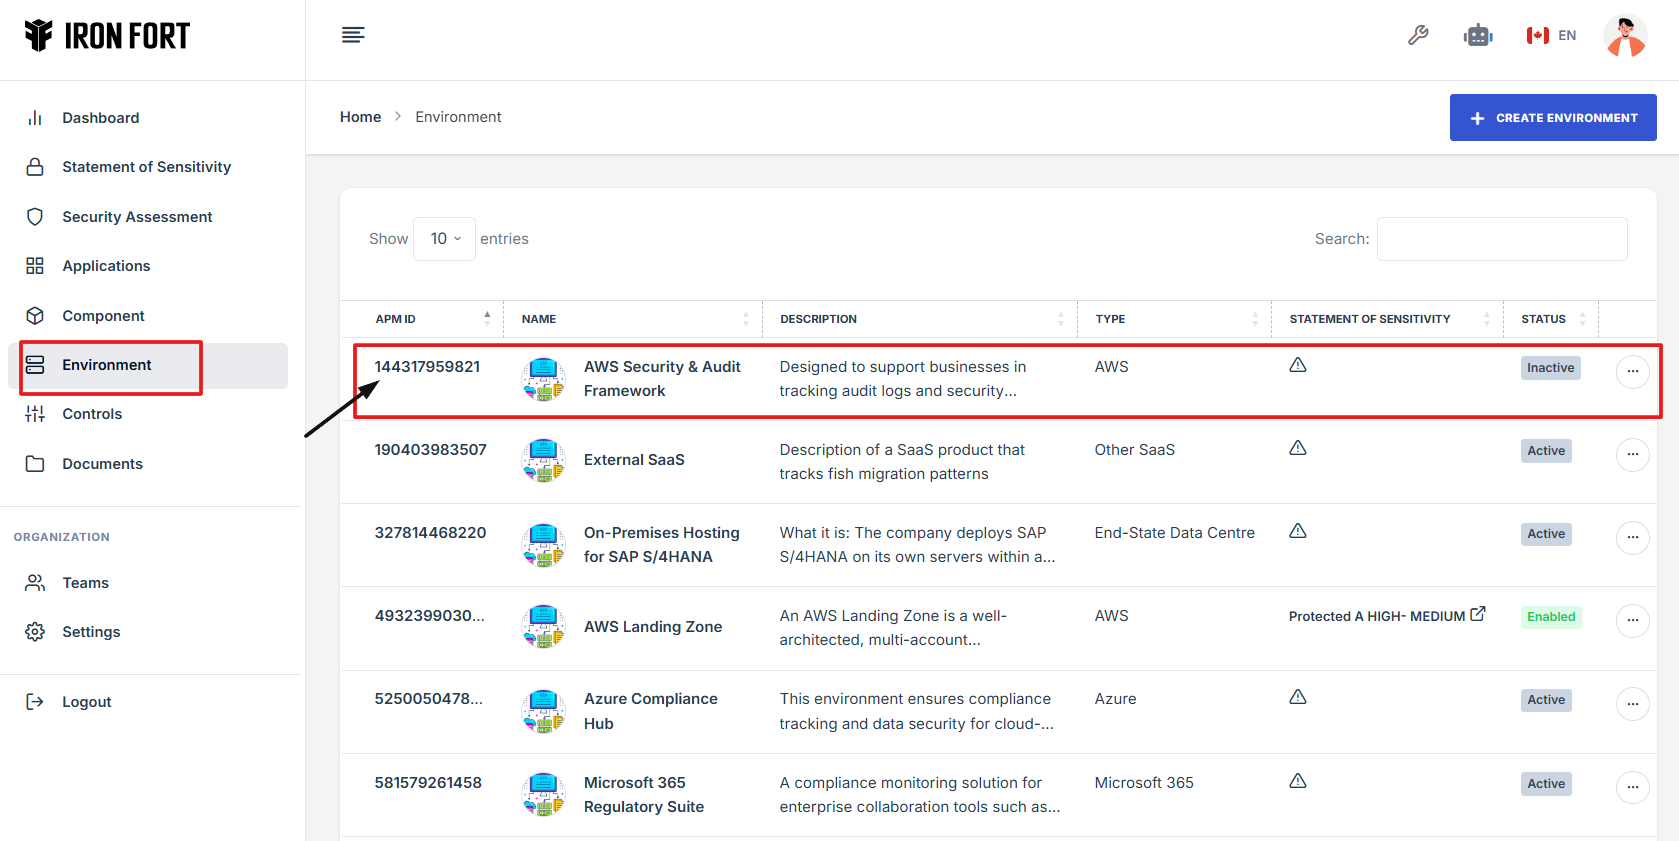
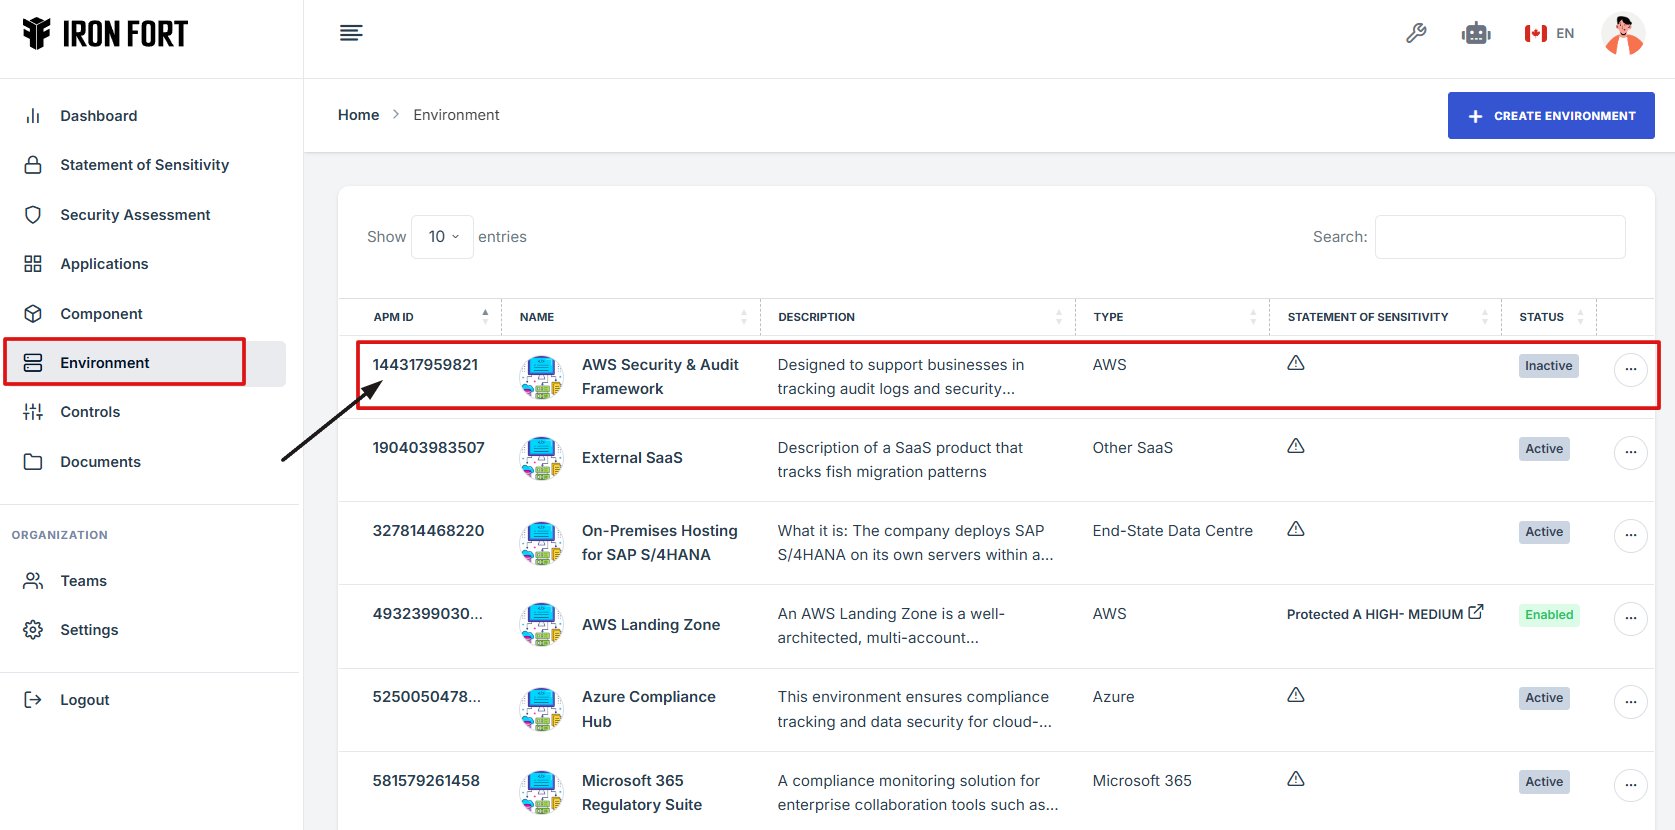
2. Locate and click the Environment tab on the dashboard.
3. Under the Environment page, click the “APM ID” to get to the overview page.
-
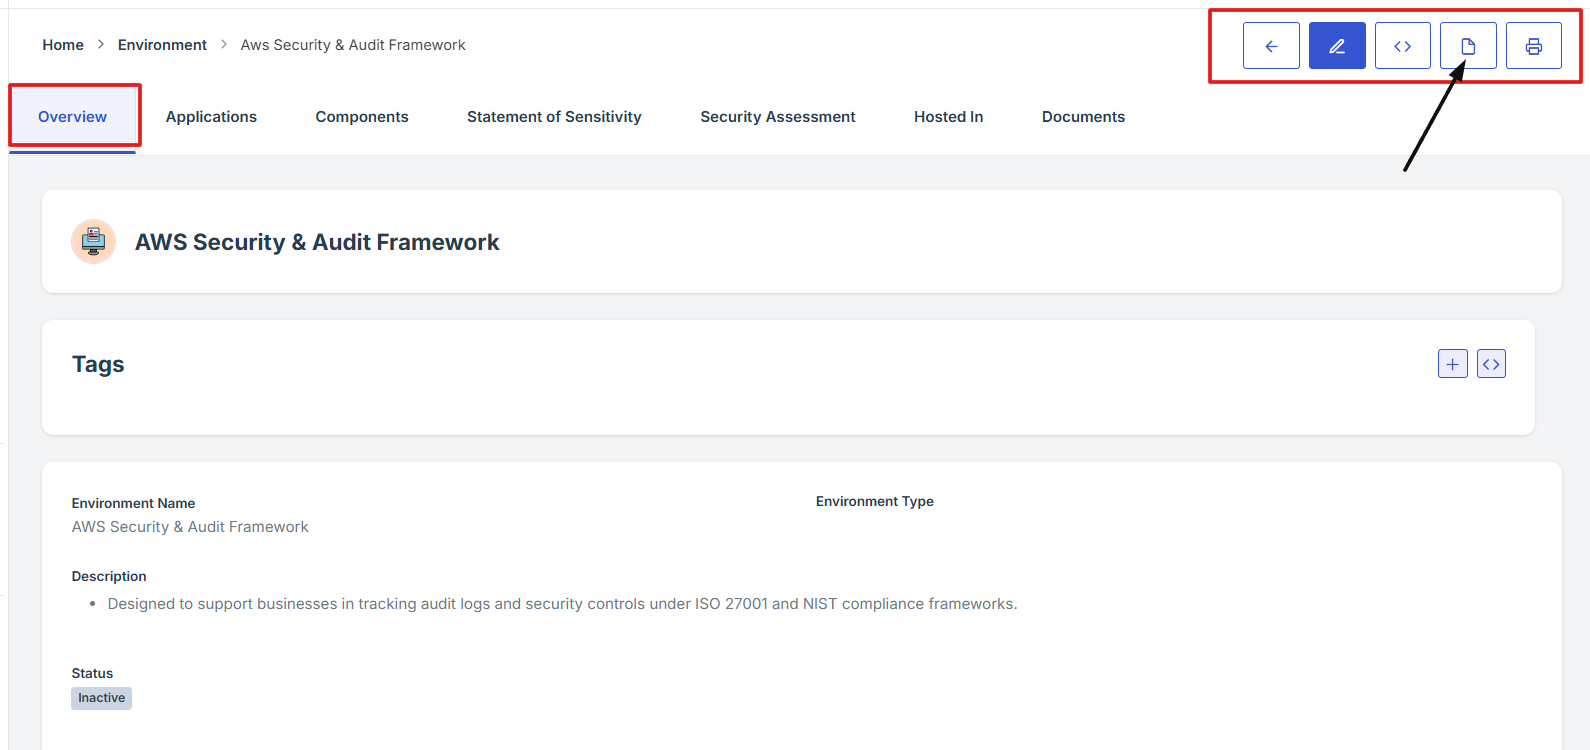
How To: View Environment Overview details
- Log in to Iron fort: How To: Login
- Locate and click the Environment tab on the dashboard.
- Under the Environment page, click the “APM ID” to get to the overview page.
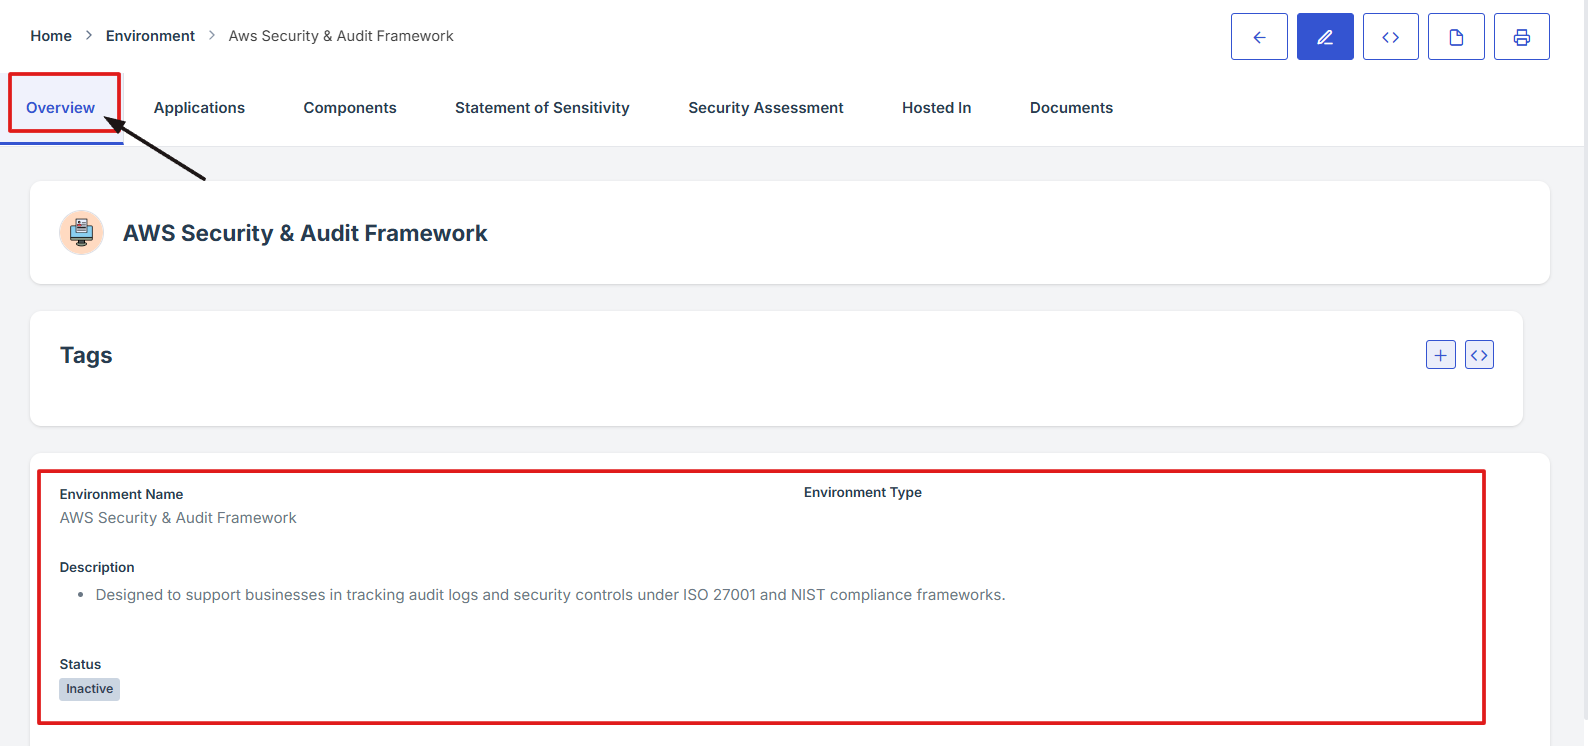
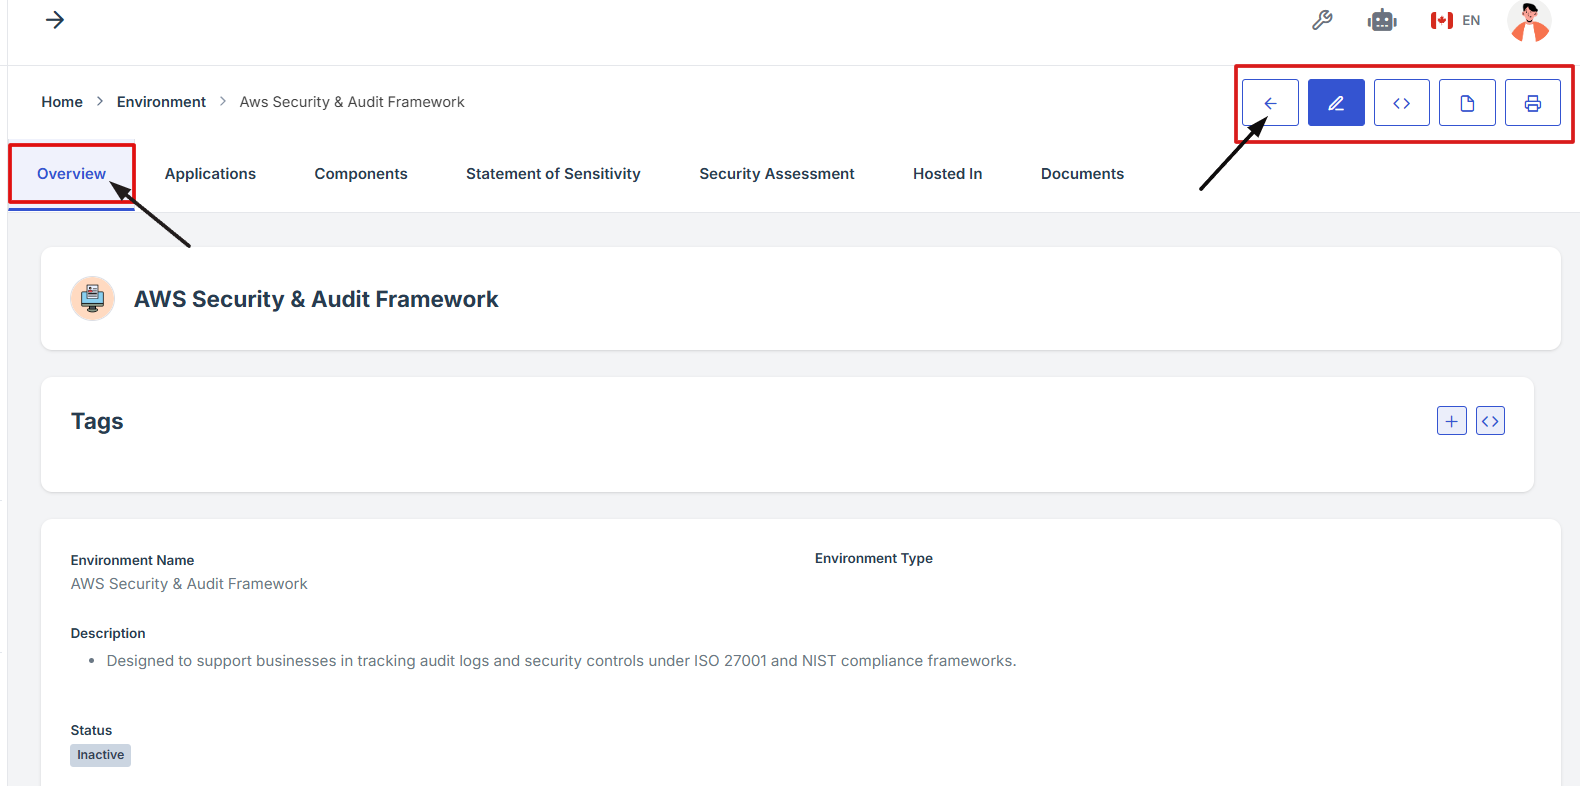
- Once on the overview page, you'll see a summary section that provides key details about the environment, such as its name, region, status, and hosting platform.
1. Log in to Iron fort: How To: Login
2. Locate and click the Environment tab on the dashboard.
3. Under the Environment page, click the “APM ID” to get to the overview page.
4. Once on the overview page, you'll see a summary section that provides key details about the environment, such as its name, region, status, and hosting platform.

1. Log in to Iron fort: How To: Login
2. Locate and click the Environment tab on the dashboard.
3. Under the Environment page, click the “APM ID” to get to the overview page.
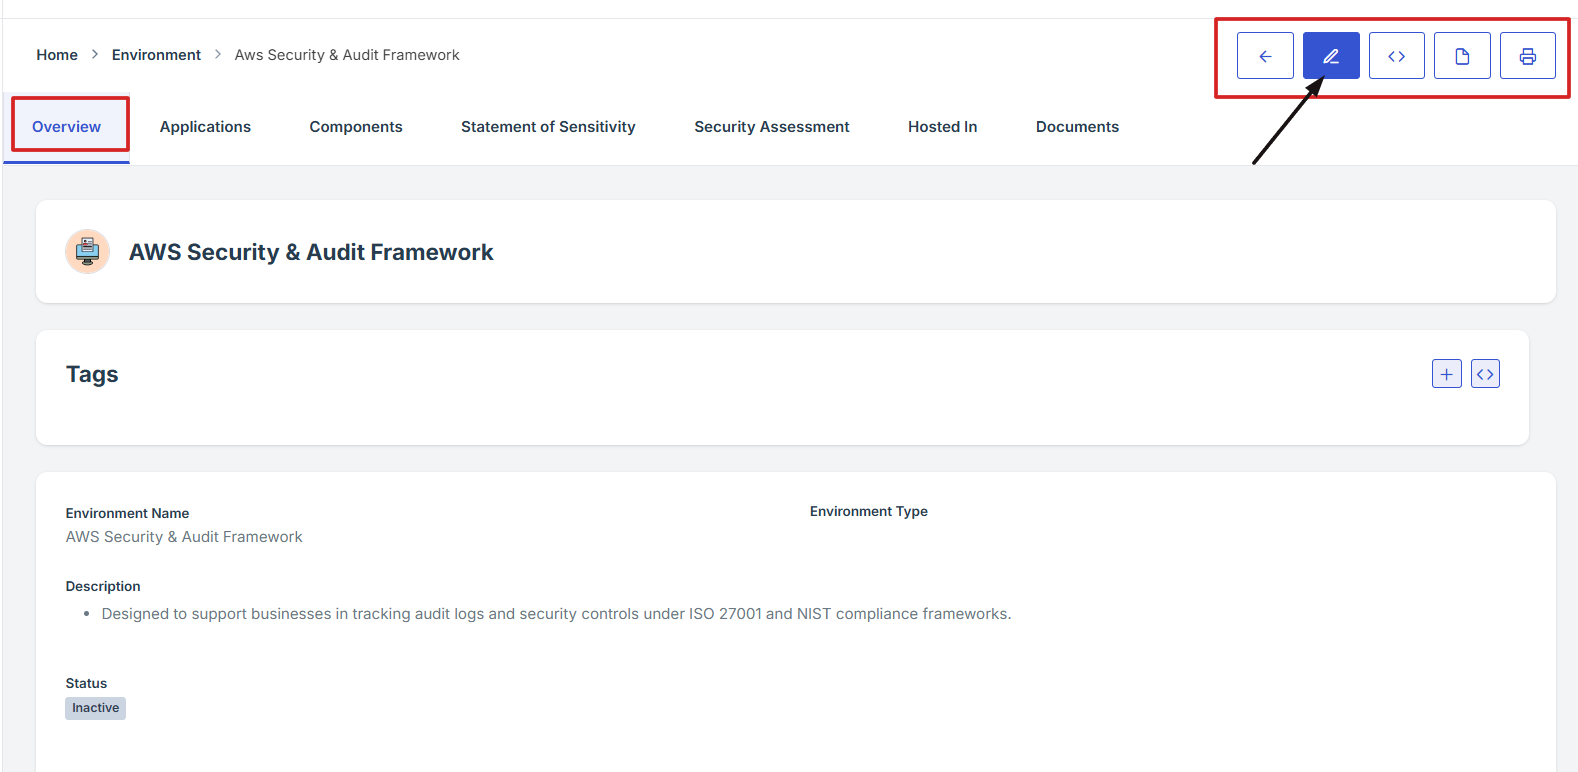
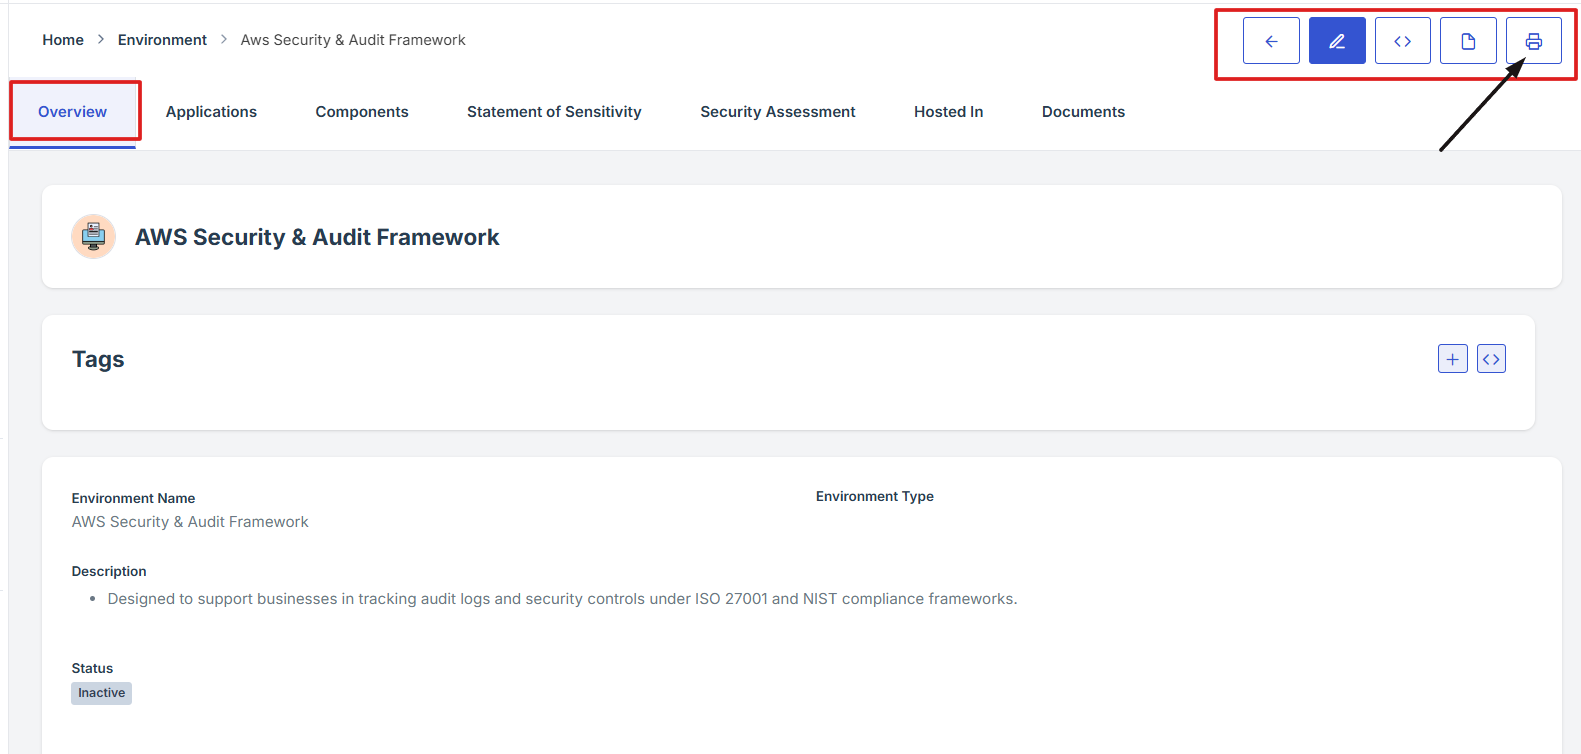
4. On the Environment overview page, navigate at the top right corner and click the pencil icon to edit the Environment.
1. Log in to Iron fort: How To: Login
2. Locate and click the Environment tab on the dashboard.
3. Under the Environment page, click the “APM ID” to get to the overview page.
4. On the Environment Overview page, navigate to the top right corner and click the print icon to print the Environment Overview page.
-
How To: Navigate tag Icon under Environment
- Log in to Iron fort: How To: Login
- Locate and click the Environment tab on the dashboard.
- Under the Environment page, click the “APM ID” to get to the overview page.
- On the Environment Overview page, navigate to the Tag section and click the (+) icon to add tags.
- Add key details and value, click submit to save changes.
-
How To: Navigate to Application Tab under Environment
- Log in to Iron fort: How To: Login
- Locate and click the Environment tab on the dashboard.
- Under the Environment page, click the “APM ID” to get to the overview page.
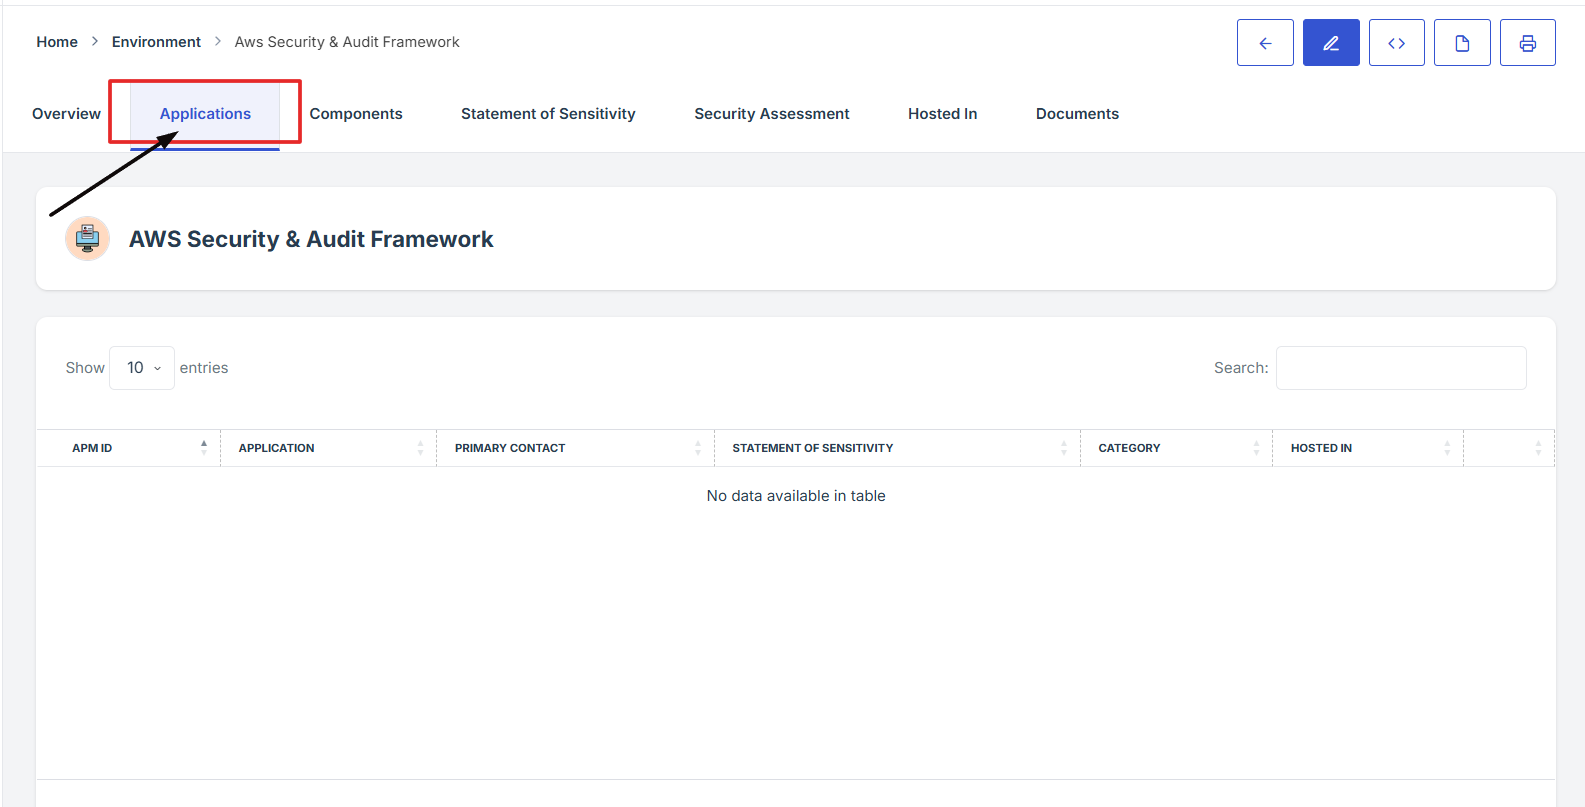
- On the Environment page, click on the "Application" tab in the ribbon to access the list of applications associated with the environment.
- From this section, you can view details or manage configurations for each application linked to the environment.

-
How To: Navigate to Components Tab in Environment
- Log in to Iron fort: How To: Login
- Locate and click the Environment tab on the dashboard.
- Under the Environment page, click the “APM ID” to get to the overview page.
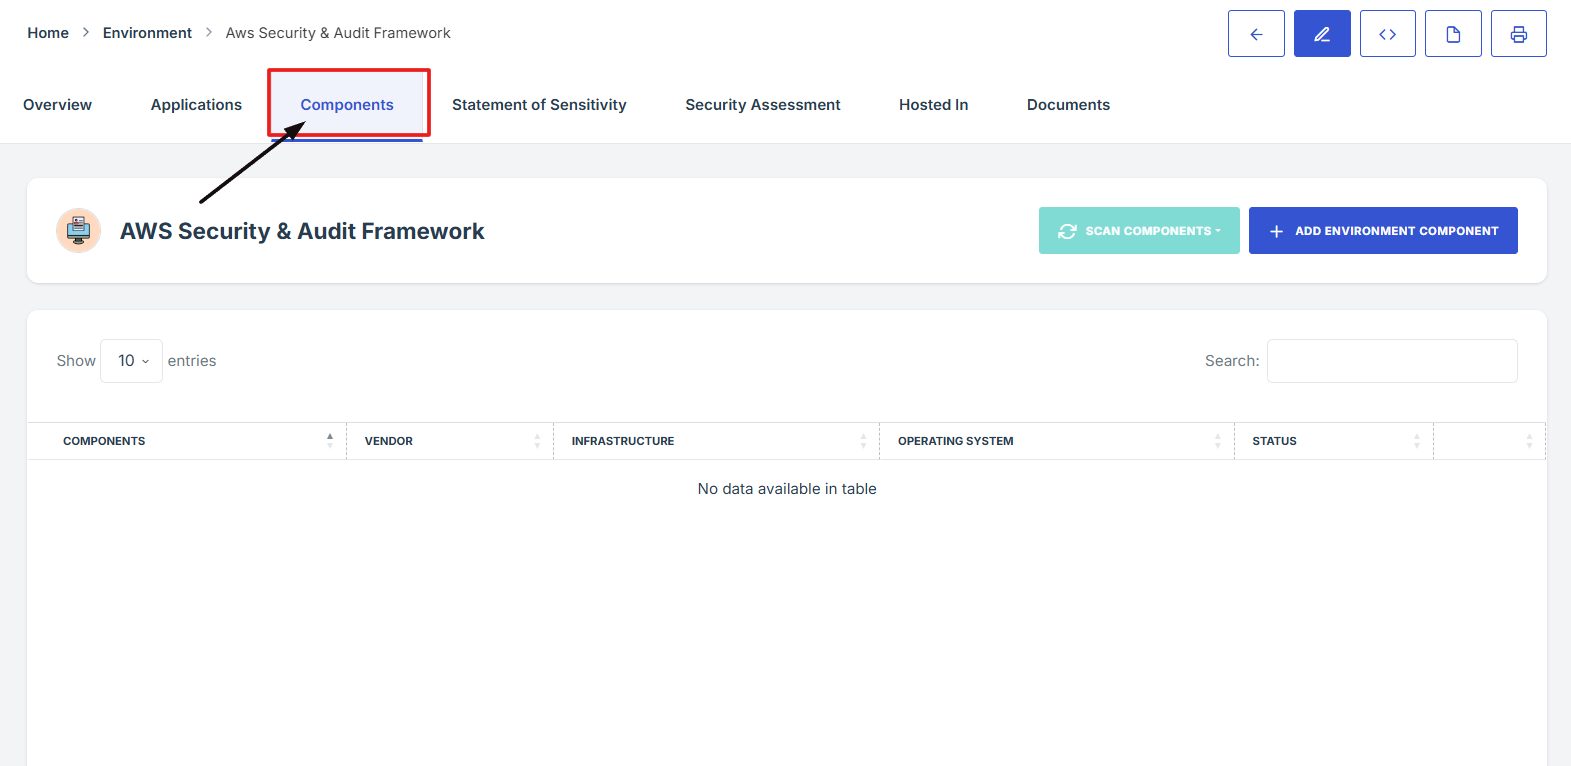
- On the Environment page, go to the top navigation ribbon and click Components tab to view or manage the environment’s components details.

-
How To: Add environment under Components in Environment
- Log in to Iron fort: How To: Login
- Locate and click the Environment tab on the dashboard.
- Under the Environment page, click the “APM ID” to get to the overview page.
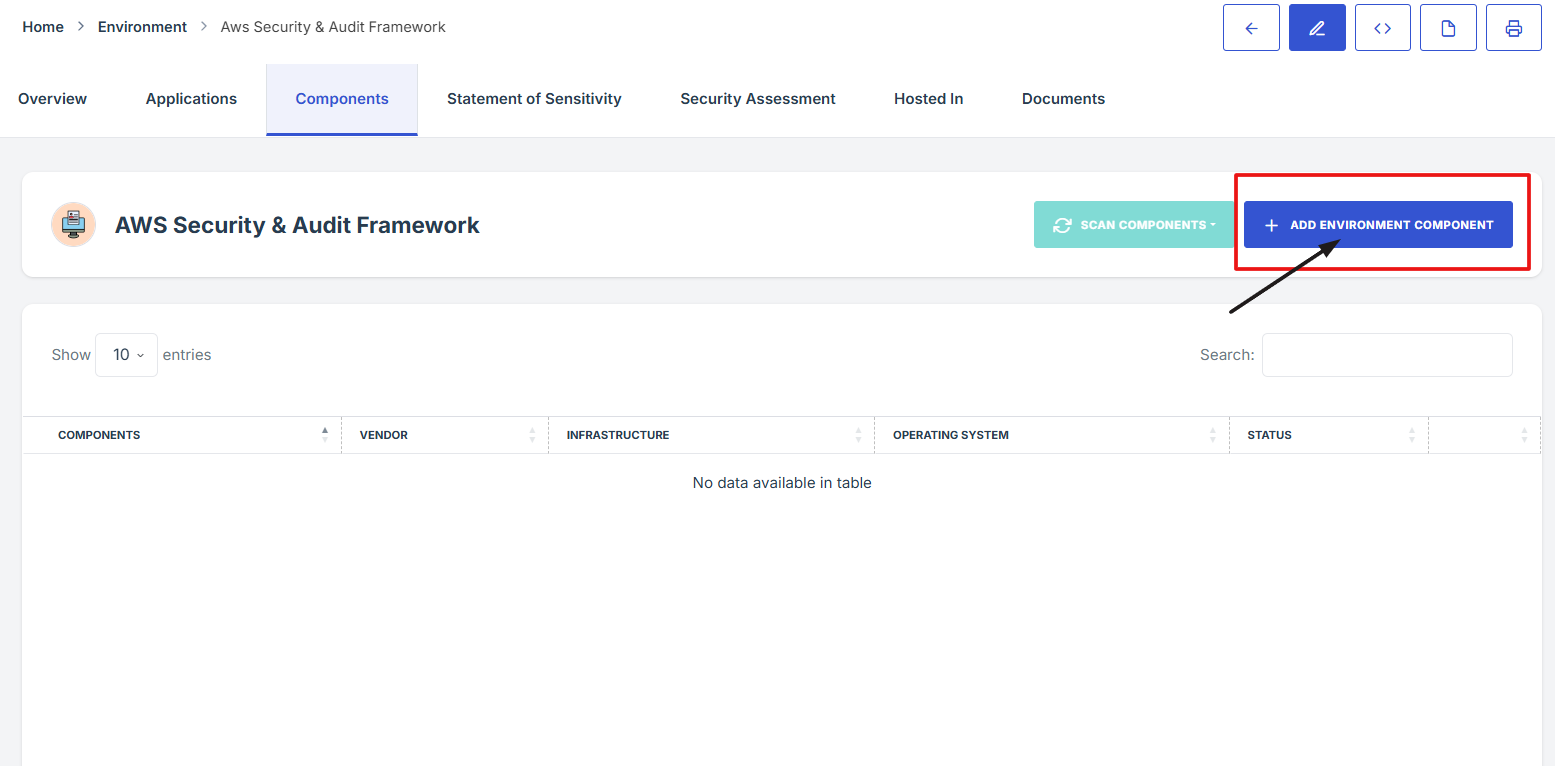
- From the Environment page, go to the top navigation bar and click on Components.
- Locate your Environment name, then click on Add Environment Components to begin adding components.
1. Log in to Iron fort: How To: Login
2. Locate and click the Environment tab on the dashboard.
3. Under the Environment page, click the “APM ID” to get to the overview page.

4. From the Environment page, go to the top navigation bar and click on Components.

5. Locate your Environment name, then click on Add Environment Components to begin adding components.
-
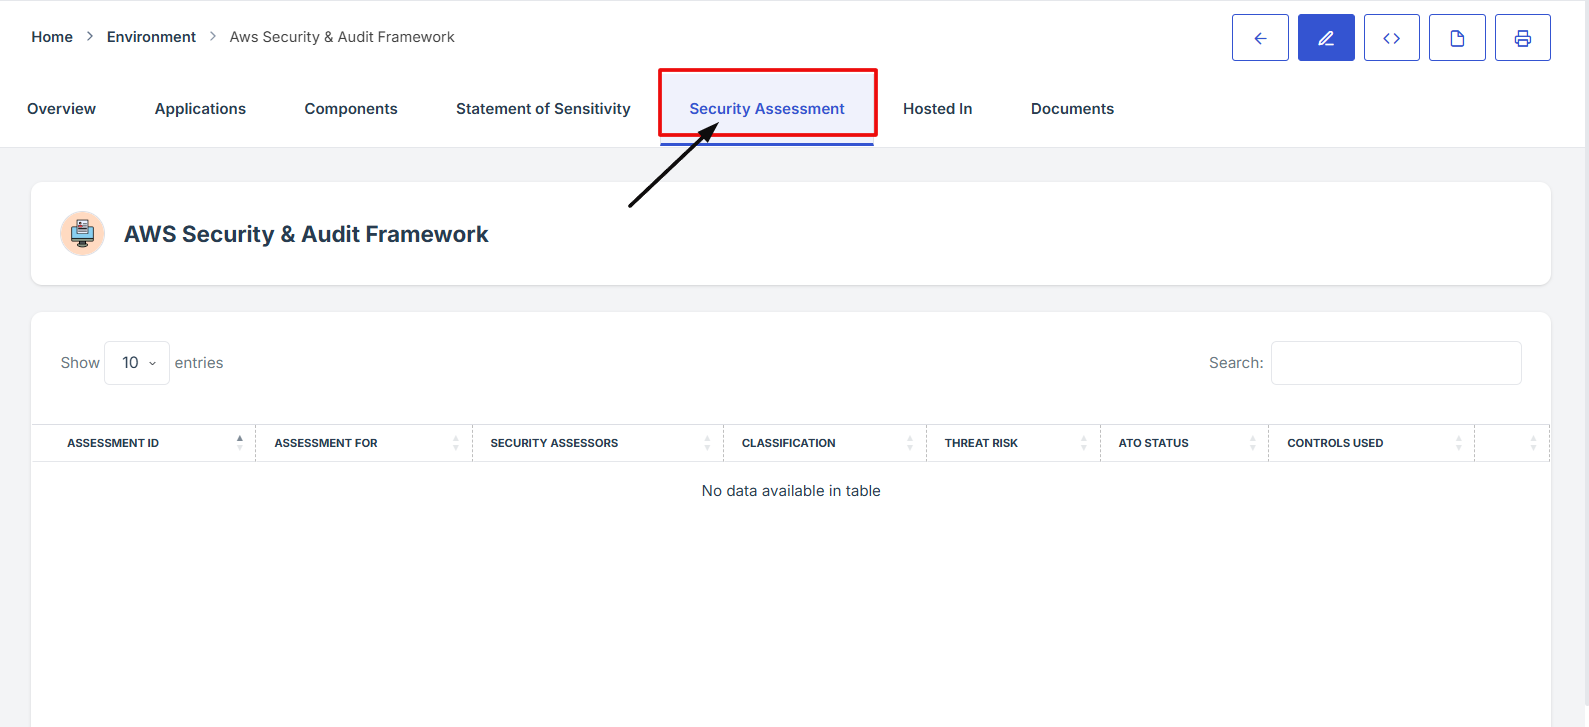
How To: Navigate to Statement of Sensitivity under Environment
- Log in to Iron fort: How To: Login
- Locate and click the Environment tab on the dashboard.
- Under the Environment page, click the “APM ID” to get to the overview page.
- On the Environment page, navigate at the top navigation menu, click on the Statement of Sensitivity tab.
- This section displays the statement of sensitivity details for the selected environment.


-
How To: Navigate to Hosted In under Environment
- Log in to Iron fort: How To: Login
- Locate and click the Environment tab on the dashboard.
- Under the Environment page, click the “APM ID” to get to the overview page.
- On the Environment page, navigate at the top navigation menu and click on the Hosted In tab.
- This section will provide you with details about where the environment is hosted, such as the hosting provider, region, and other relevant infrastructure information.


1. Log in to Iron fort: How To: Login
2. Locate and click the Environment tab on the dashboard.
3. Under the Environment page, click the “APM ID” to get to the overview page.

4. On the Environment overview page, navigate at the top right corner, click the PDF icon to download the Environment overview details.