
How To Guidelines in Statement Of Sensitivity
This page offers step-by-step guidance on creating and managing a Statement of Sensitivity in the Iron Fort Compliance system, helping users ensure proper data classification and risk assessment.
-
How To: Create a new Statement Of Sensitivity
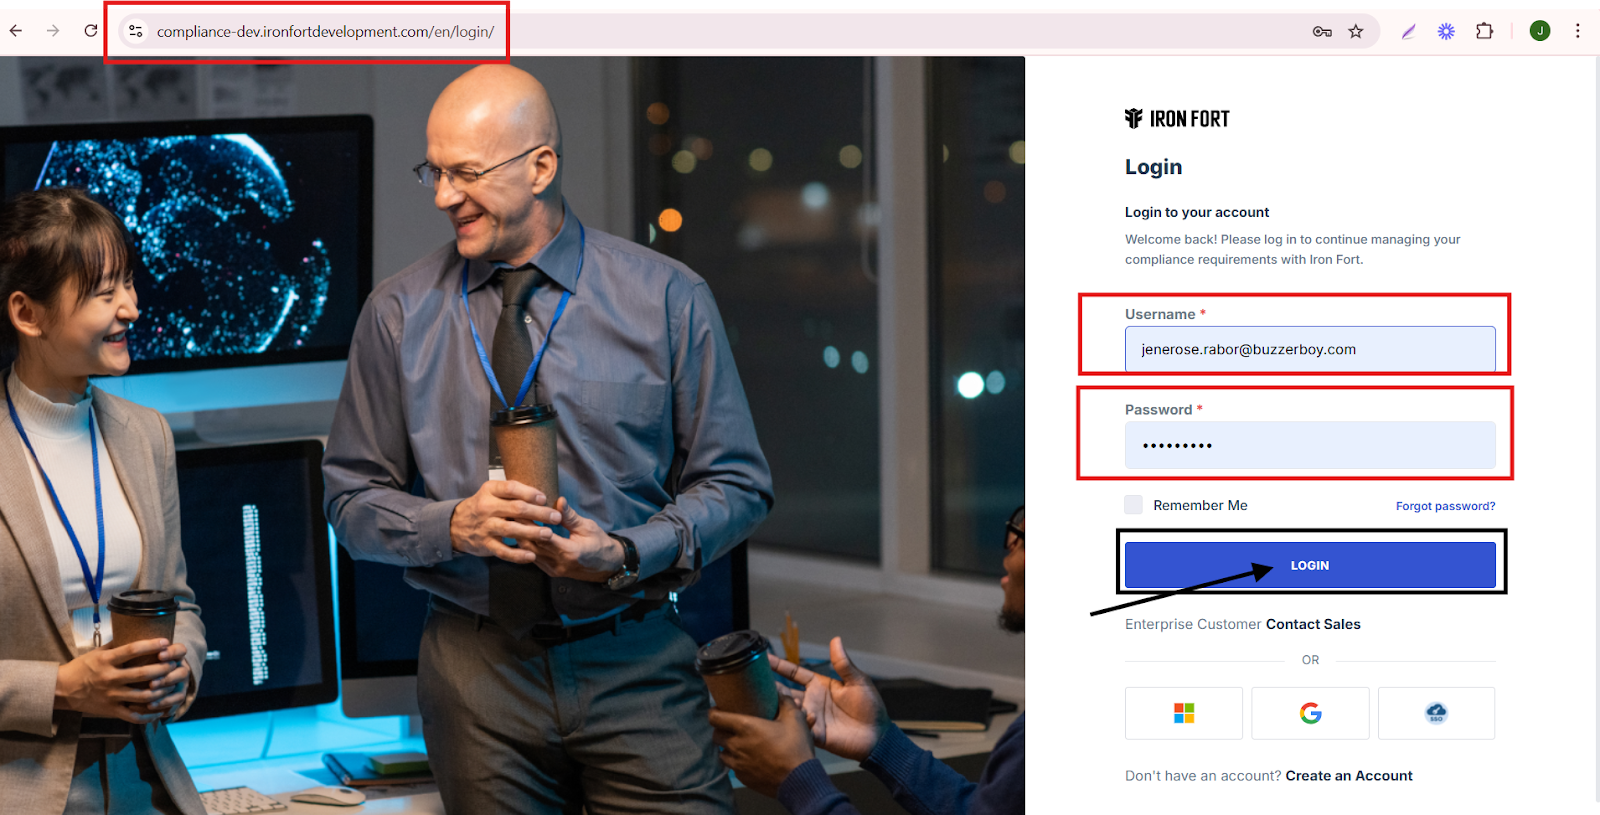
- Navigate to your organization’s Iron Fort Compliance login page
- Log in to Your Account
- Check your email for the One-Time Password (OTP) sent on your email and enter the OTP to proceed
- Once logged in, a welcome prompt will appear displaying
- Move your cursor to the left side of the dashboard to reveal the menu
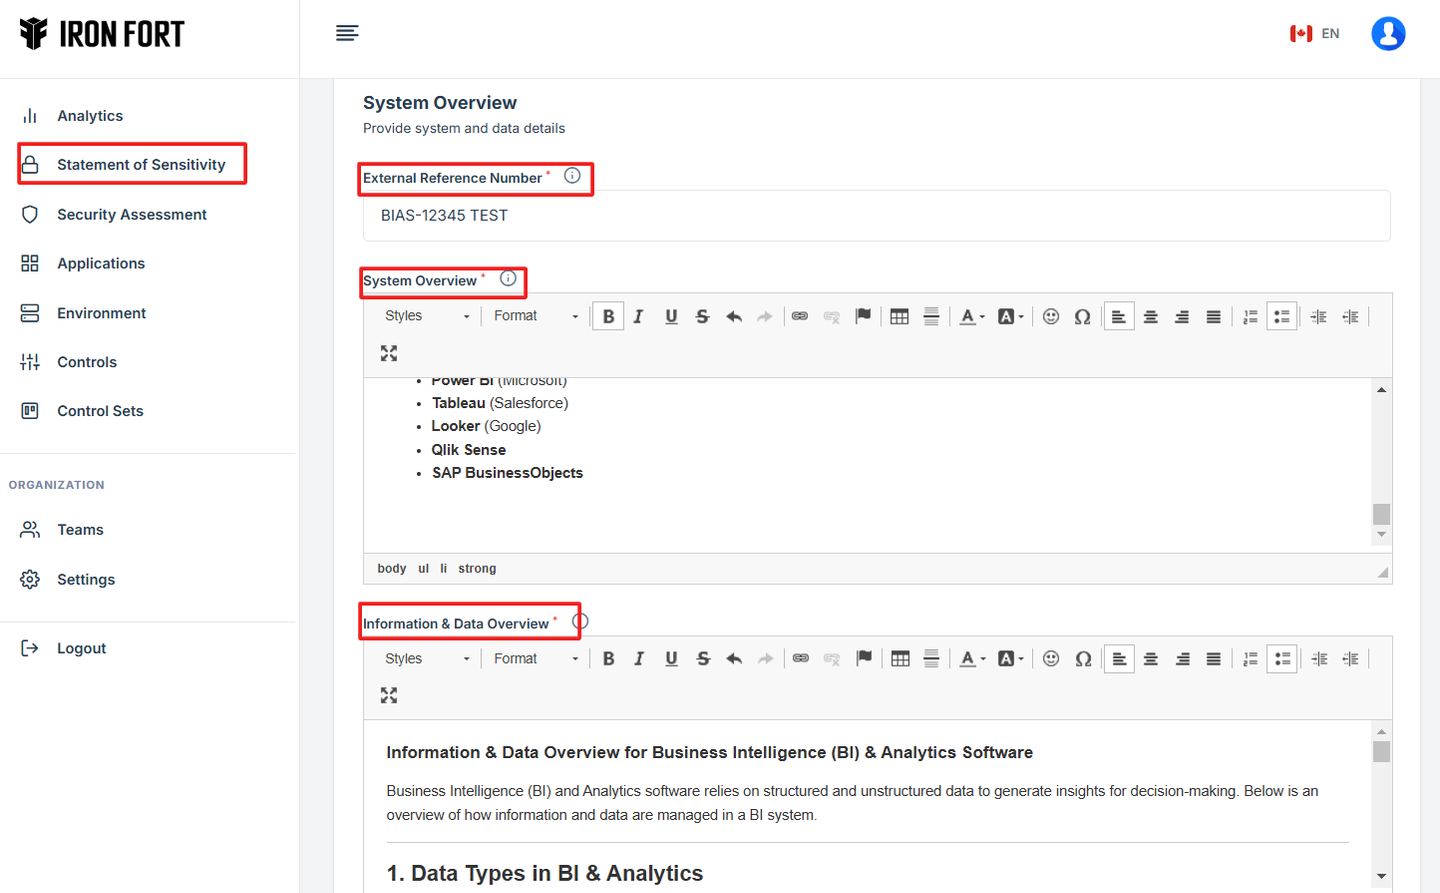
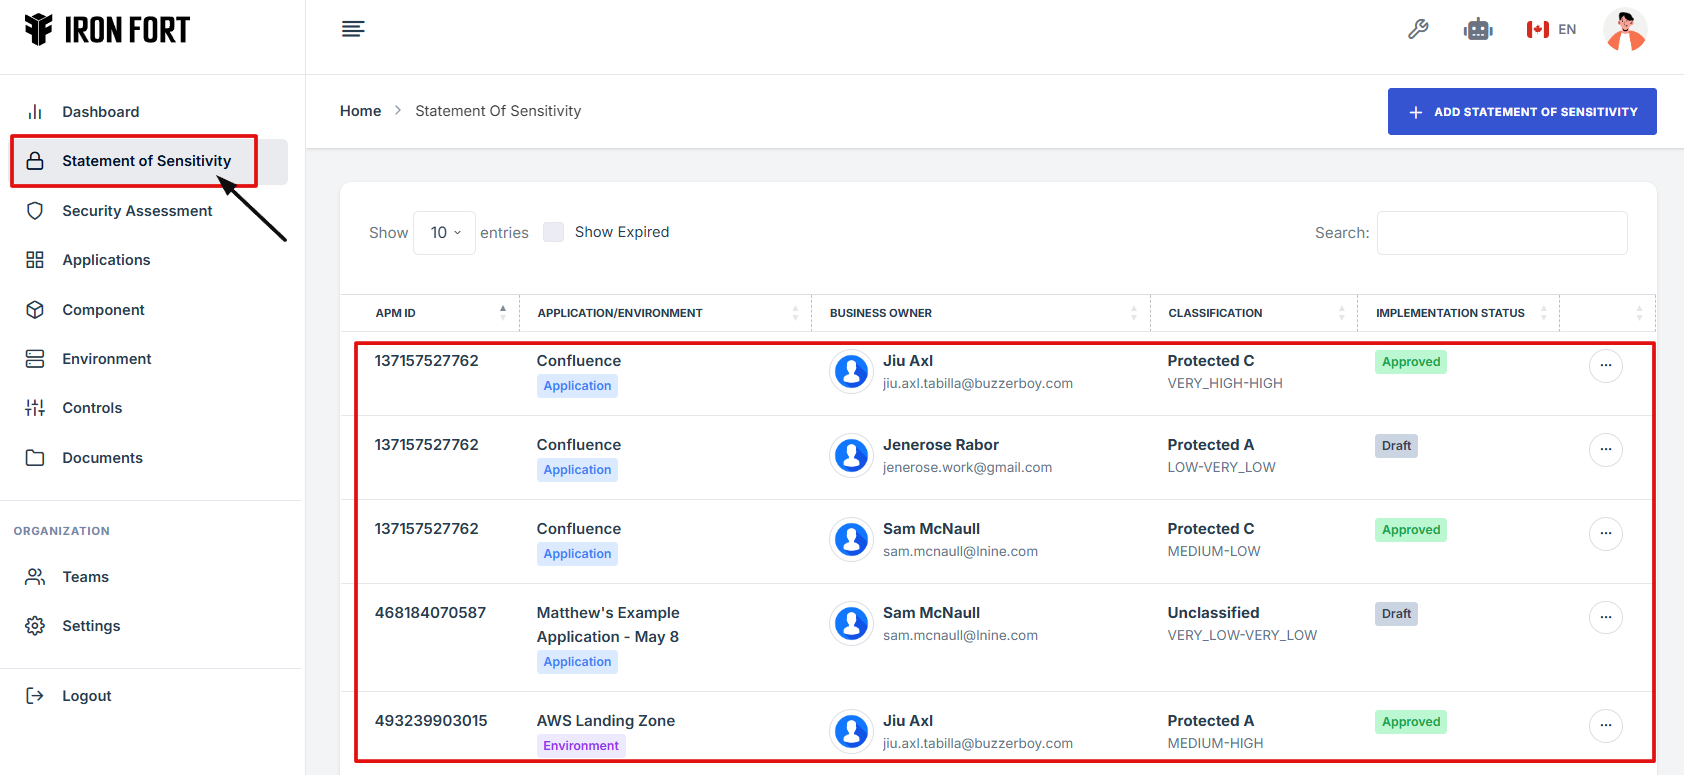
- Locate and click the Statement of Sensitivity tab on the dashboard.
- Click Add Statement of Sensitivity to begin setting up a new statement of sensitivity.
- Choose between
- Fill Out Required Information for the following details
- Input System Overview Details
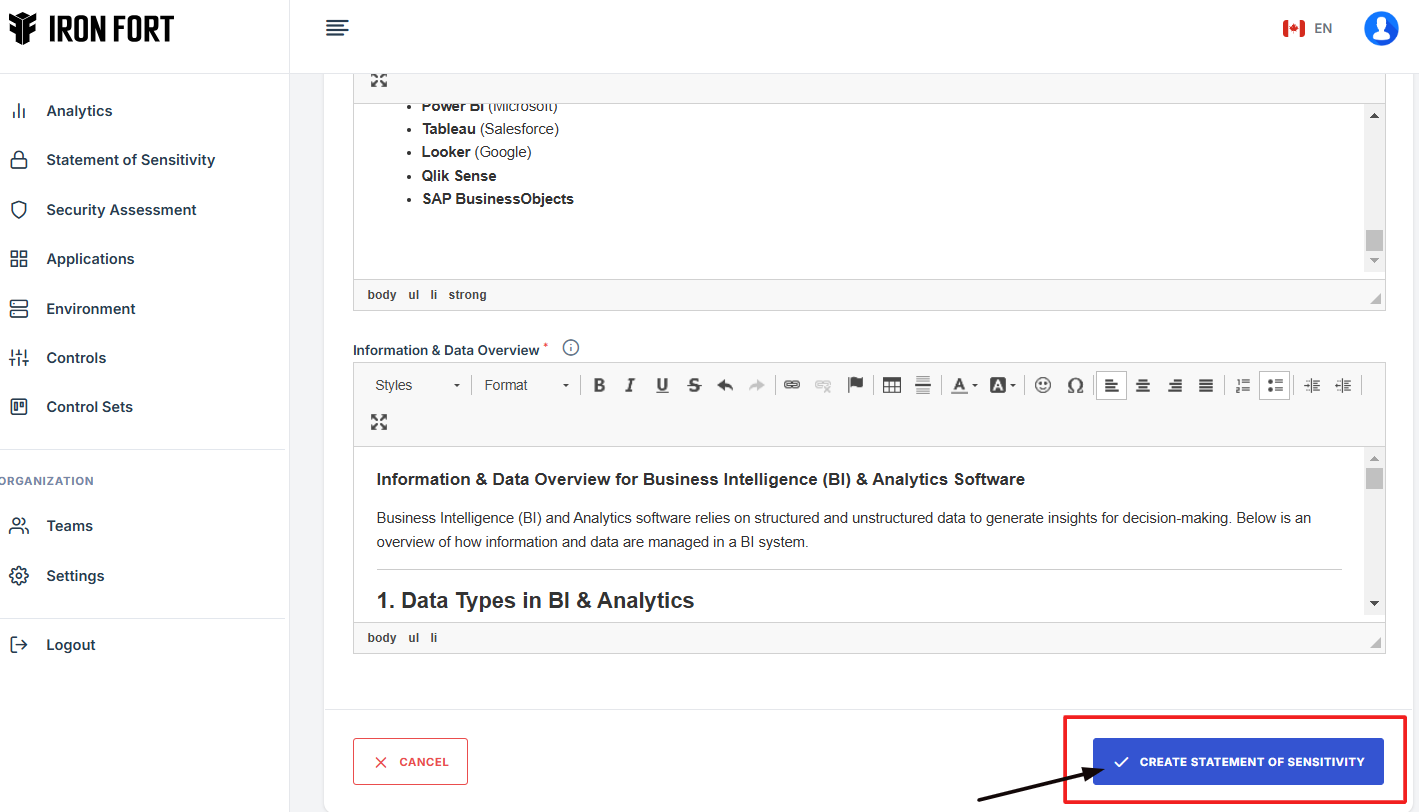
- Click Save to store the Statement of Sensitivity.
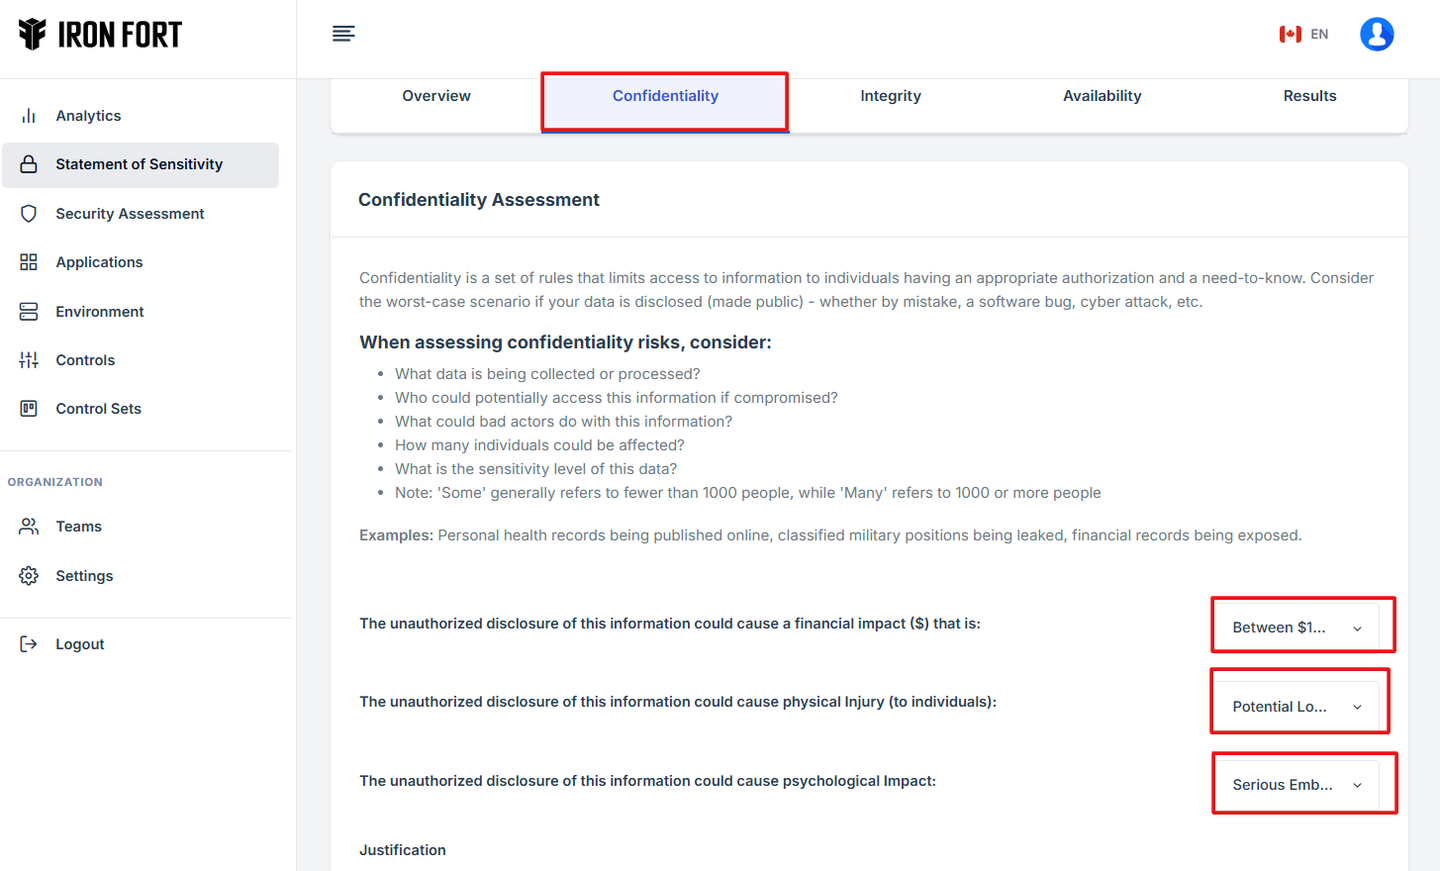
- The system will redirect you to the Confidentiality page.
- Enter the required information regarding data confidentiality and potential risks.
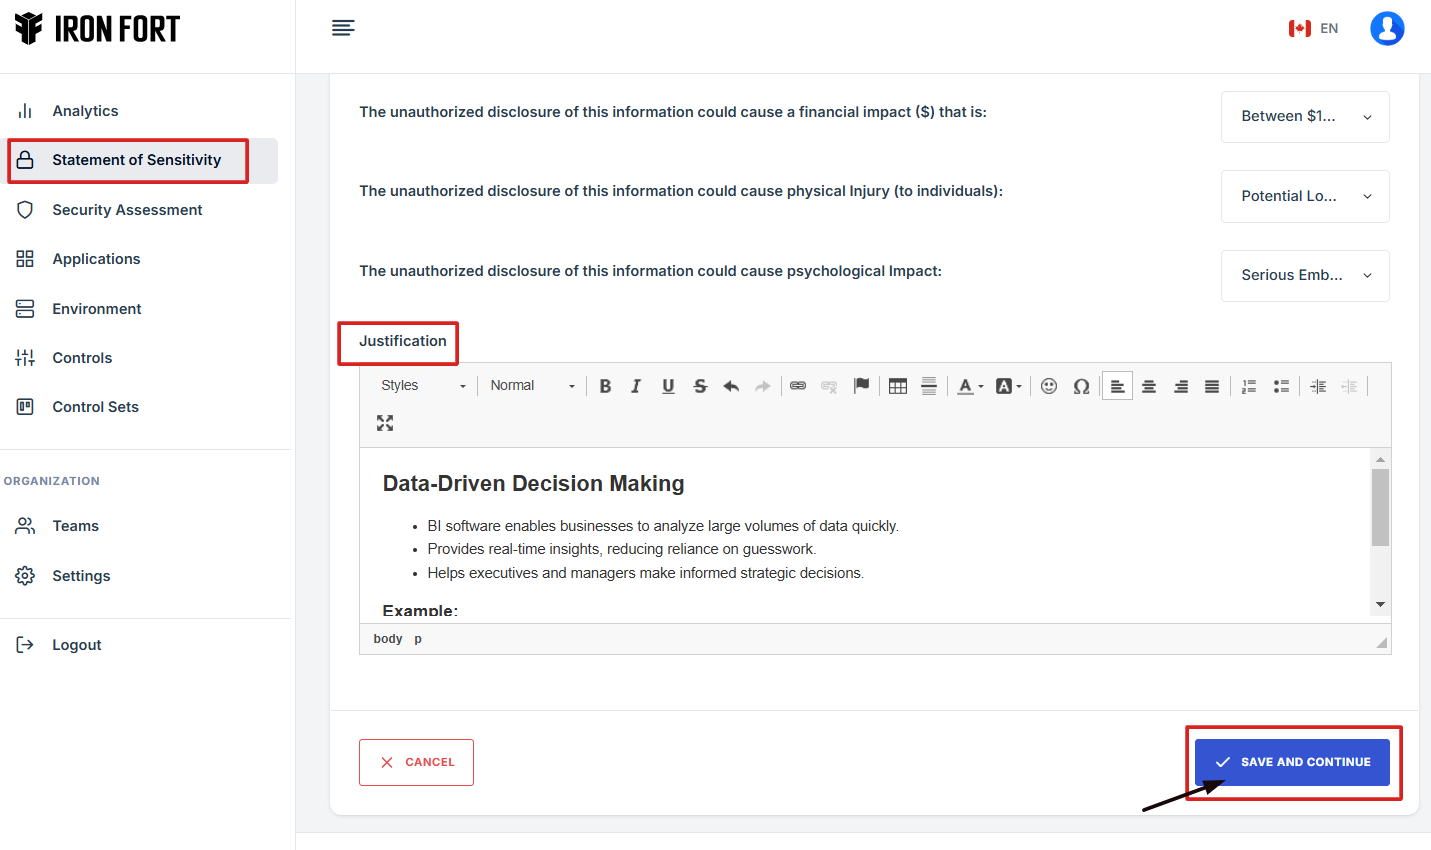
- Click Save to continue.
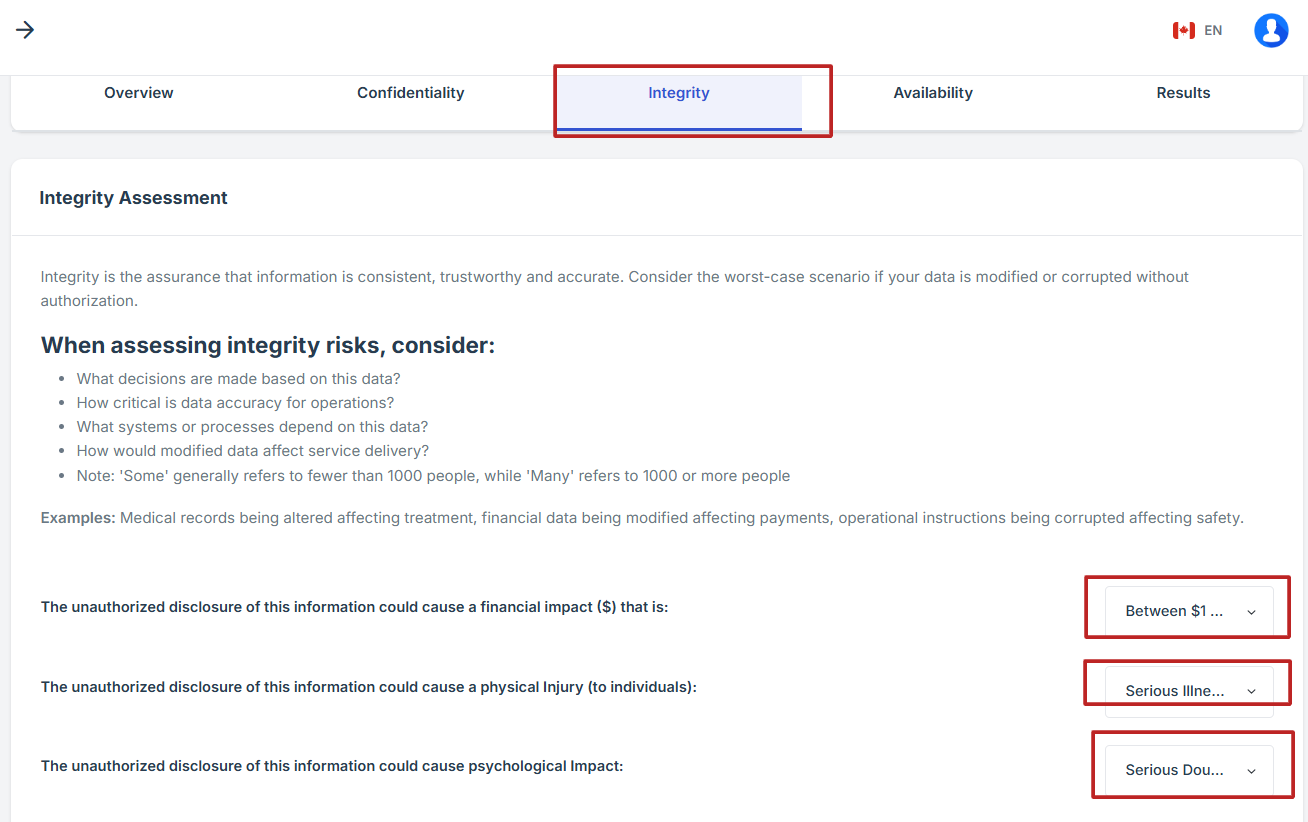
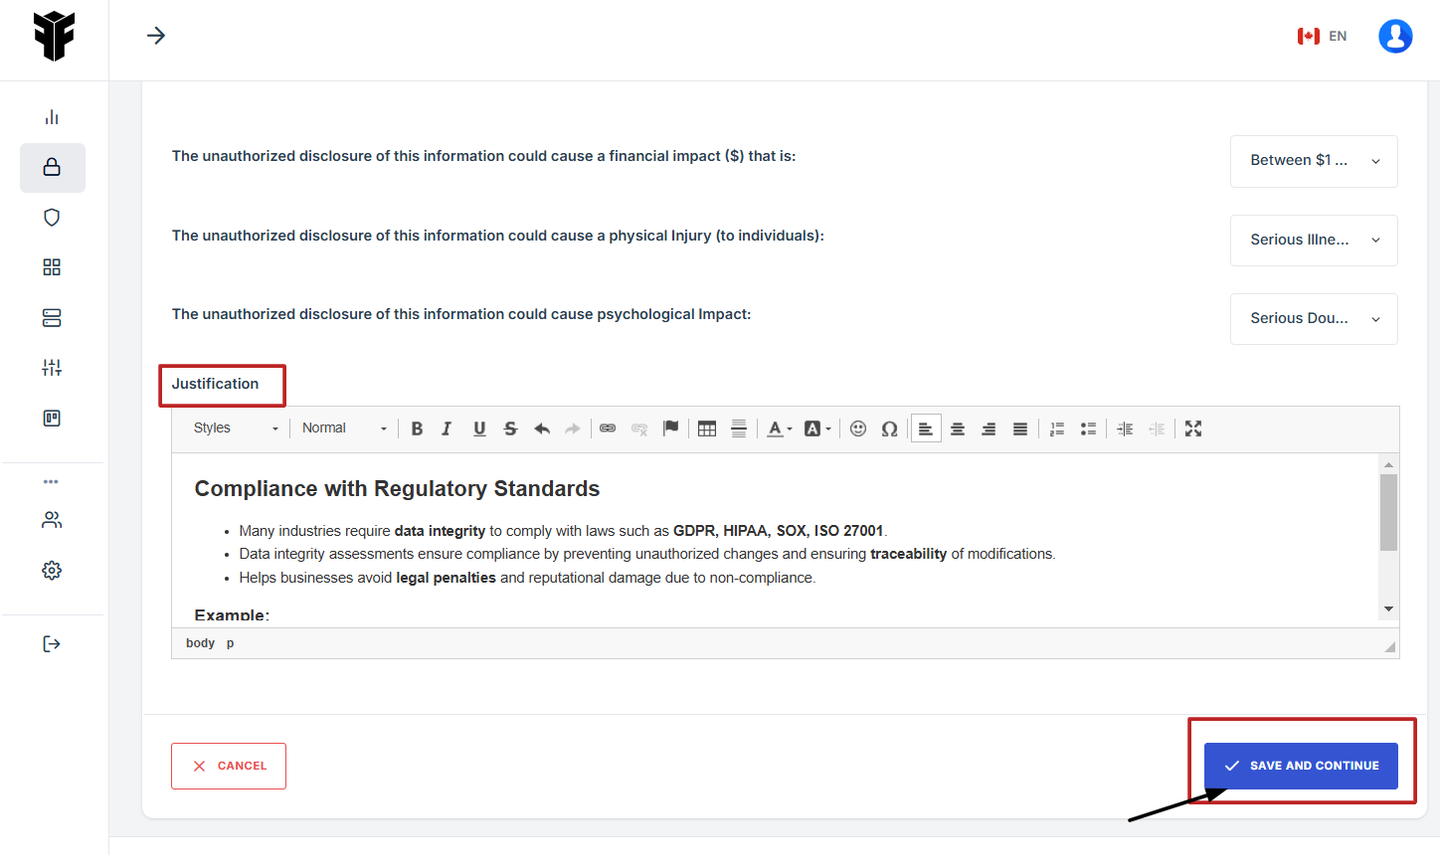
- Provide details on how unauthorized changes to data could impact operations through “Integrity” tab.
- Click Save to proceed.
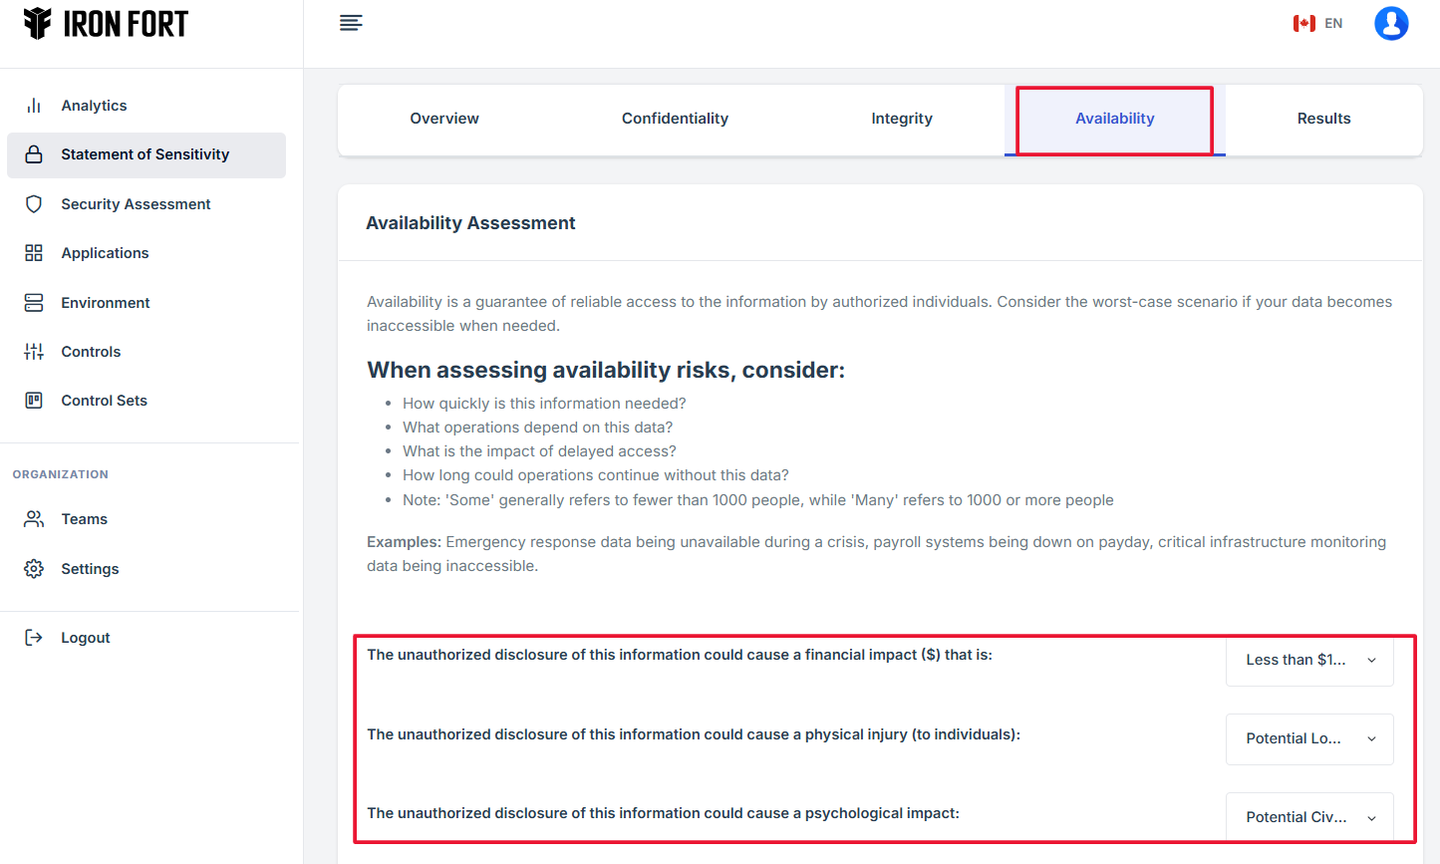
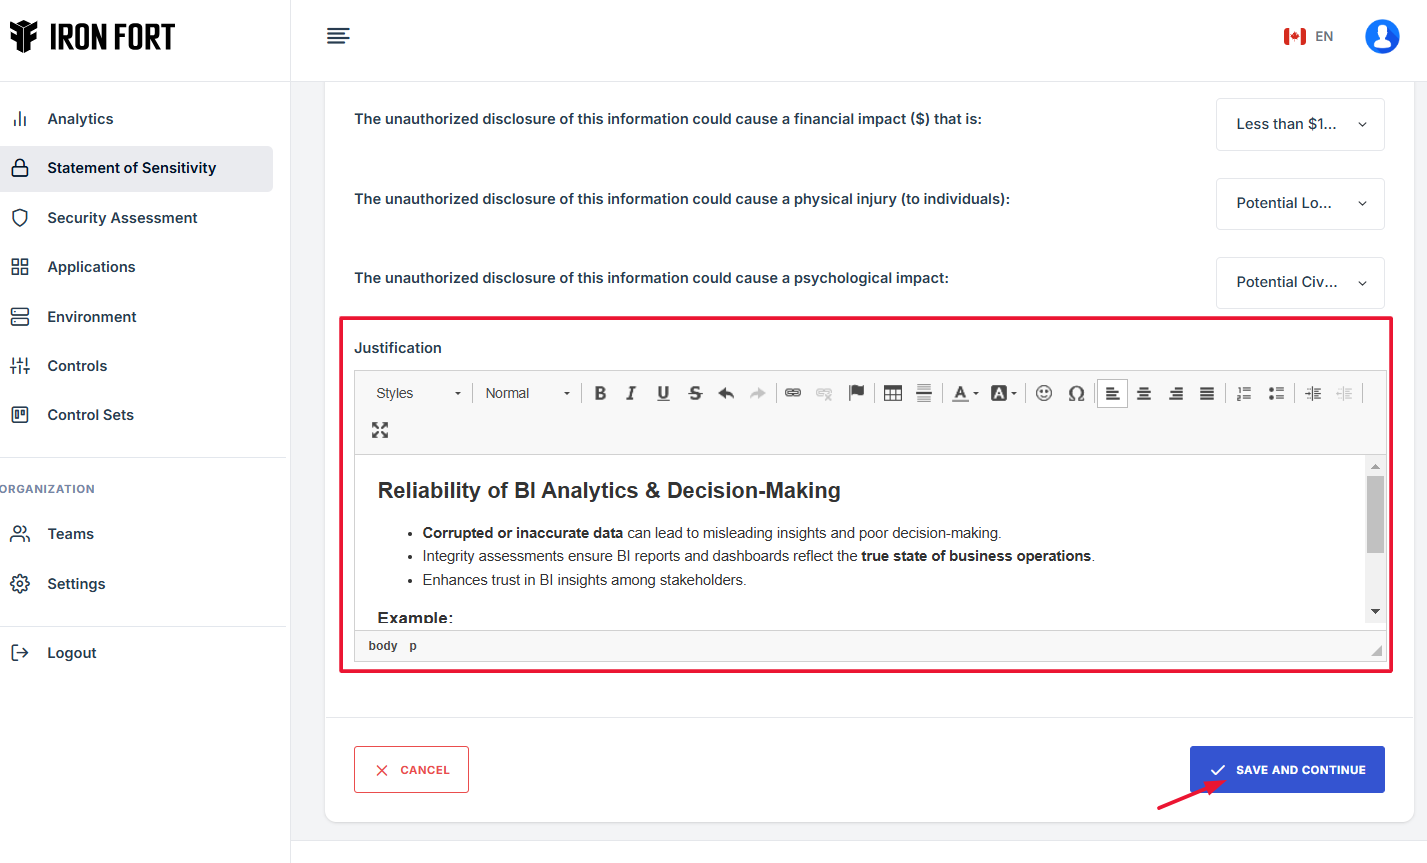
- Assess the impact of system downtime and data inaccessibility in the “Availability” tab.
- Click Save to finalize the assessment.
- After completing all sections, navigate to the Results tab.
- Review the classification results, which may include
- The system will display the final sensitivity classification for the application or environment.
1. Navigate to your organization’s Iron Fort Compliance login page
For example: https://compliance-demo.ironfortdemos.com/en/login/?next=/en
2. Log in to Your Account
Enter your email and password to log in.
3. Check your email for the One-Time Password (OTP) sent on your email and enter the OTP to proceed.

4. Once logged in, a welcome prompt will appear displaying
-
Tenant Key Information: Verifying your system access
-
User Email: Your registered email for auditing purposes
-
Last Login Details: To track your previous access
-
Iron Fort Support Email: For any login issues or concerns
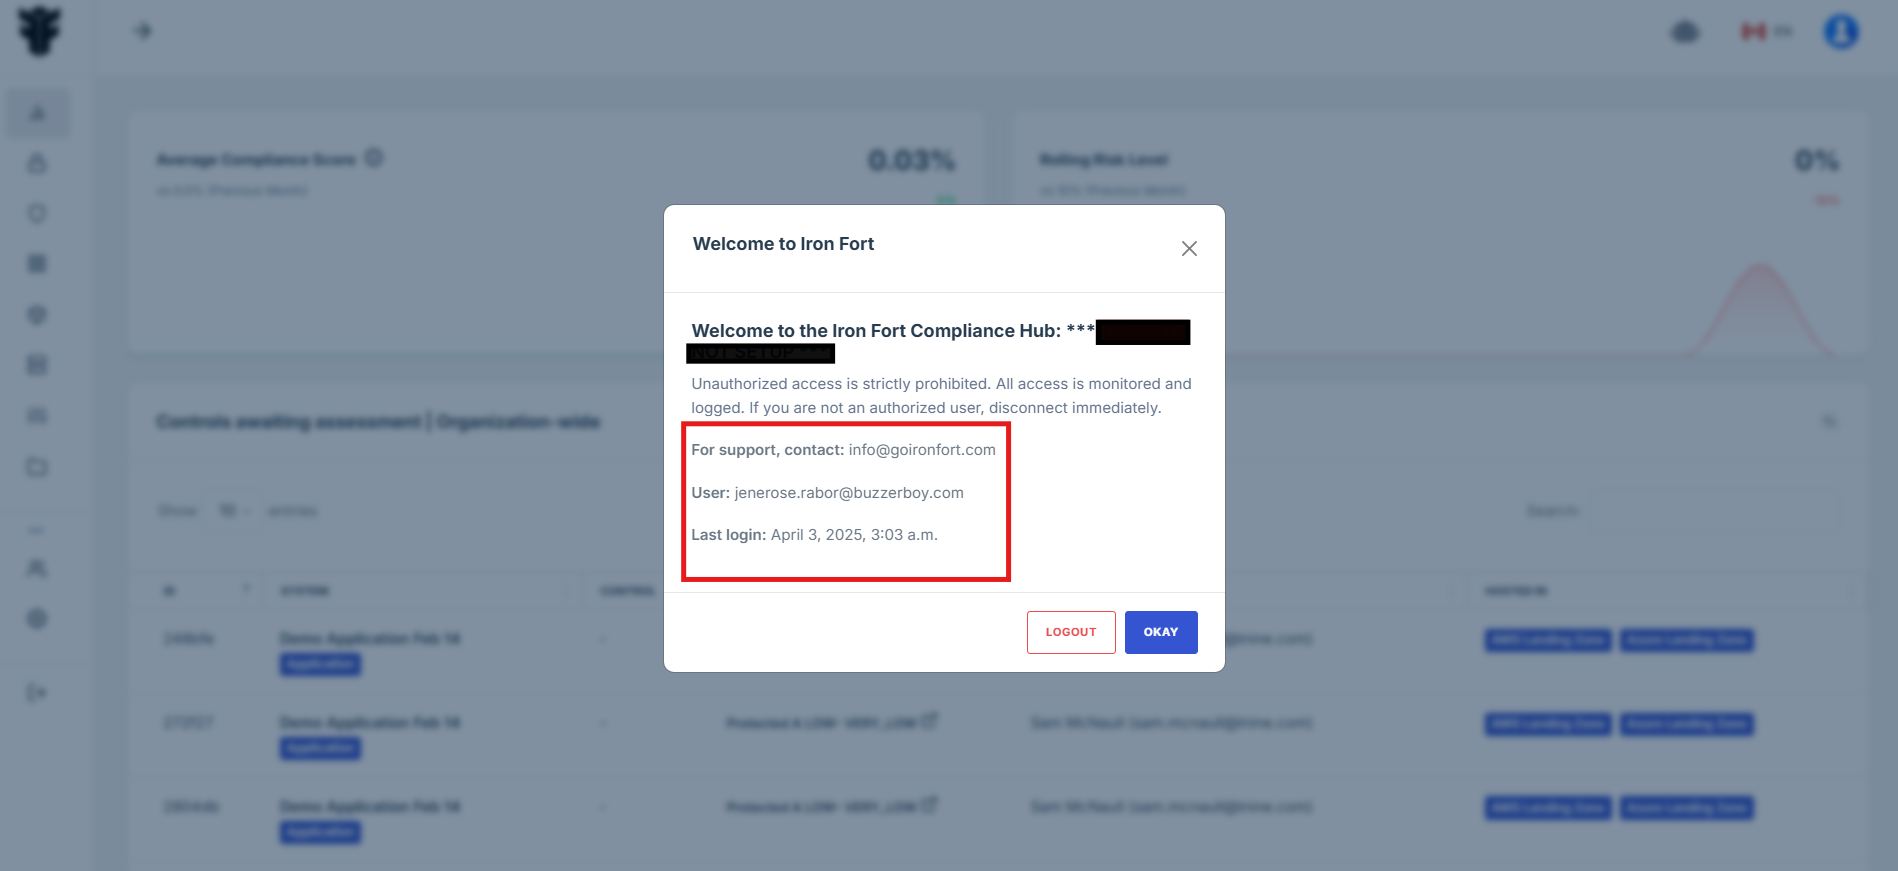
NOTE: If you recognize the details and are authorized, click "OK" to continue. However, if you are not an authorized user, click "Logout" immediately to exit.
5. Move your cursor to the left side of the dashboard to reveal the menu.
6. Locate and click the Statement of Sensitivity tab on the dashboard.
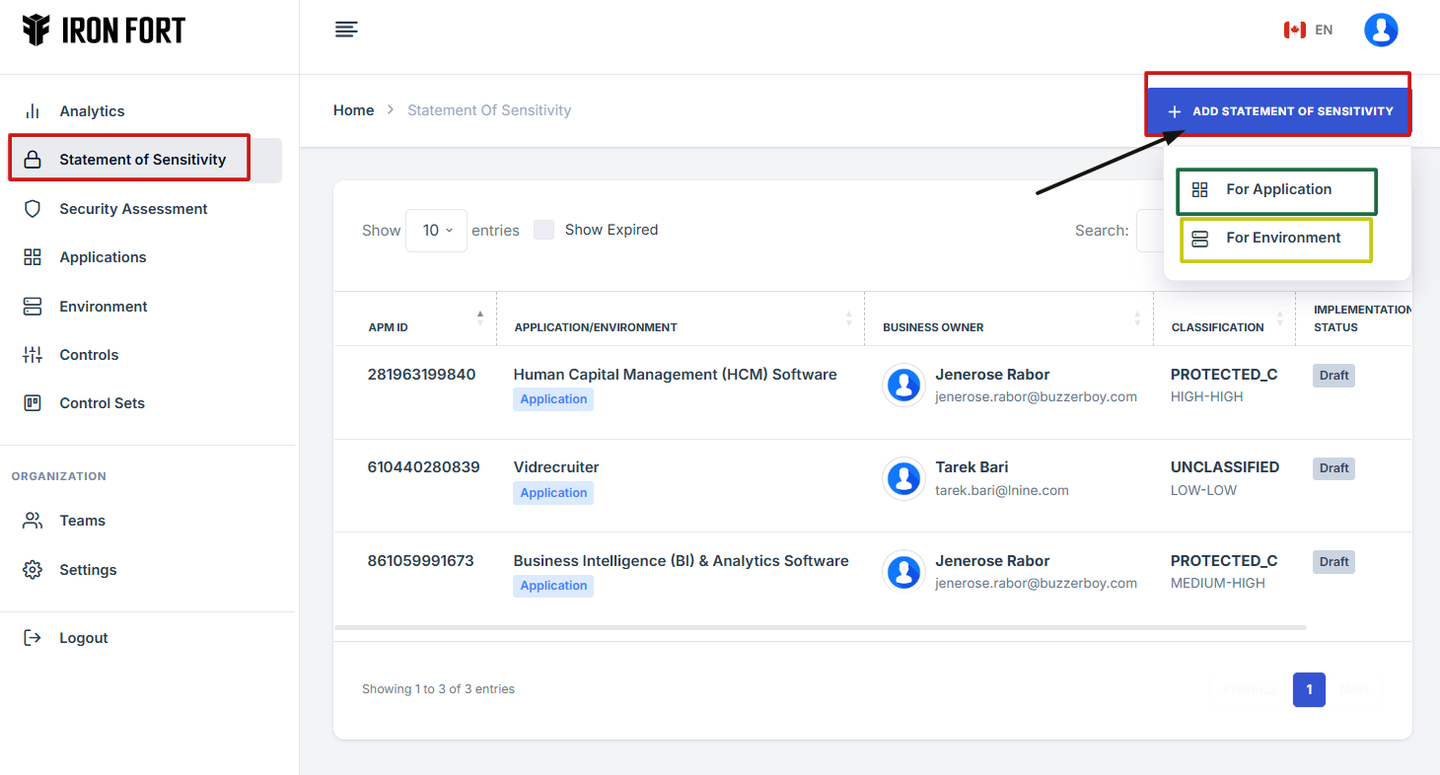
7. Click Add Statement of Sensitivity to begin setting up a new statement of sensitivity.
8. Choose between
-
For Application: if the sensitivity assessment is for a software application.
-
For Environment: if the sensitivity assessment is for an IT or business environment.
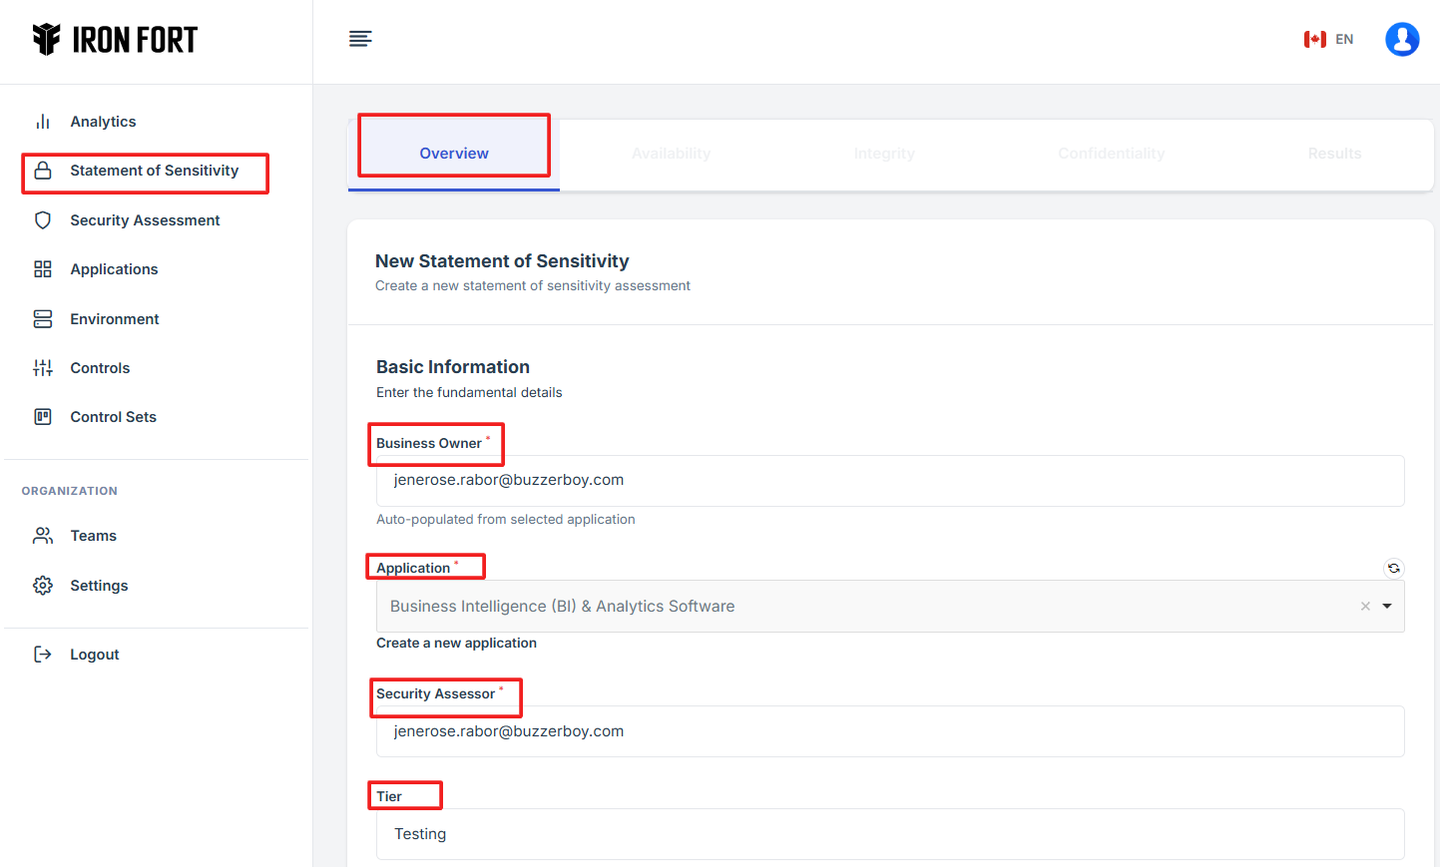
9. Fill Out Required Information for the following details
-
Business Owner: Enter the name of the person responsible for the application or environment.
-
Application Name: Specify the name of the software or system.
-
Security Assessor: Identify the individual evaluating the security risks.
-
Tier: Select the classification tier based on the level of sensitivity.
-
Implementation Status: Choose the current deployment stage.
-
Submission Date: Provide the date of submission.

10. Input System Overview Details
-
External Reference Number: Assign a unique reference code for tracking.
-
System Overview Description: Provide a brief explanation of the system’s purpose and functionality.
-
Information & Data Overview: Describe the types of data processed, stored, or transmitted.
11. Click Save to store the Statement of Sensitivity.
12. The system will redirect you to the Confidentiality page.
13. Enter the required information regarding data confidentiality and potential risks.
14. Click Save to continue.
15. Provide details on how unauthorized changes to data could impact operations through “Integrity” tab.
16. Click Save to proceed.
17. Assess the impact of system downtime and data inaccessibility in the “Availability” tab.
18. Click Save to finalize the assessment.
19. After completing all sections, navigate to the Results tab.
20. Review the classification results, which may include:
-
Confidentiality Level
-
Integrity Level
-
Availability Level
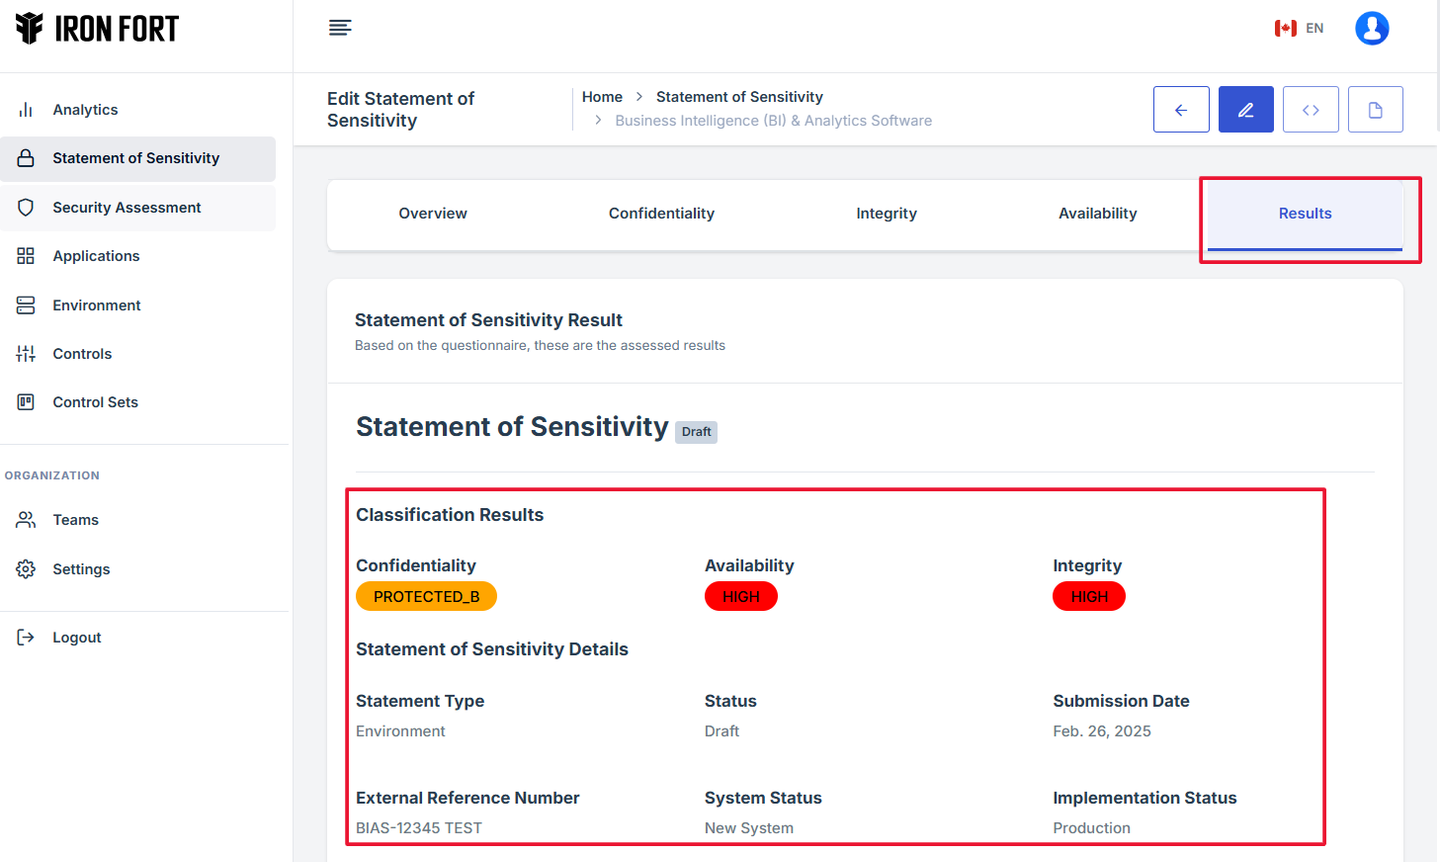
21. The system will display the final sensitivity classification for the application or environment.
-
How To: Edit Statement of Sensitivity Details
- Log in to Iron fort: How To: Login
- Locate and click the Statement of Sensitivity tab on the dashboard.
- Under the Statement of Sensitivity page, click the “APM ID” to get to the overview page.
- Once on the overview page, navigate to the top-right corner and click the pencil icon to open the editing interface for the Statement of Sensitivity.
- Update the fields as required and make sure to save your changes.
- Note
1. Log in to Iron fort: How To: Login
2. Locate and click the Statement of Sensitivity tab on the dashboard.

3. Under the Statement of Sensitivity page, click the “APM ID” to get to the overview page.

4. Once on the overview page, navigate to the top-right corner and click the pencil icon to open the editing interface for the Statement of Sensitivity.
5. Update the fields as required and make sure to save your changes.
6. Note
Note: Only users assigned as Security Reviewers have the permission to edit the Statement of Sensitivity. If you are not a Security Reviewer, the edit option will not be available.
-
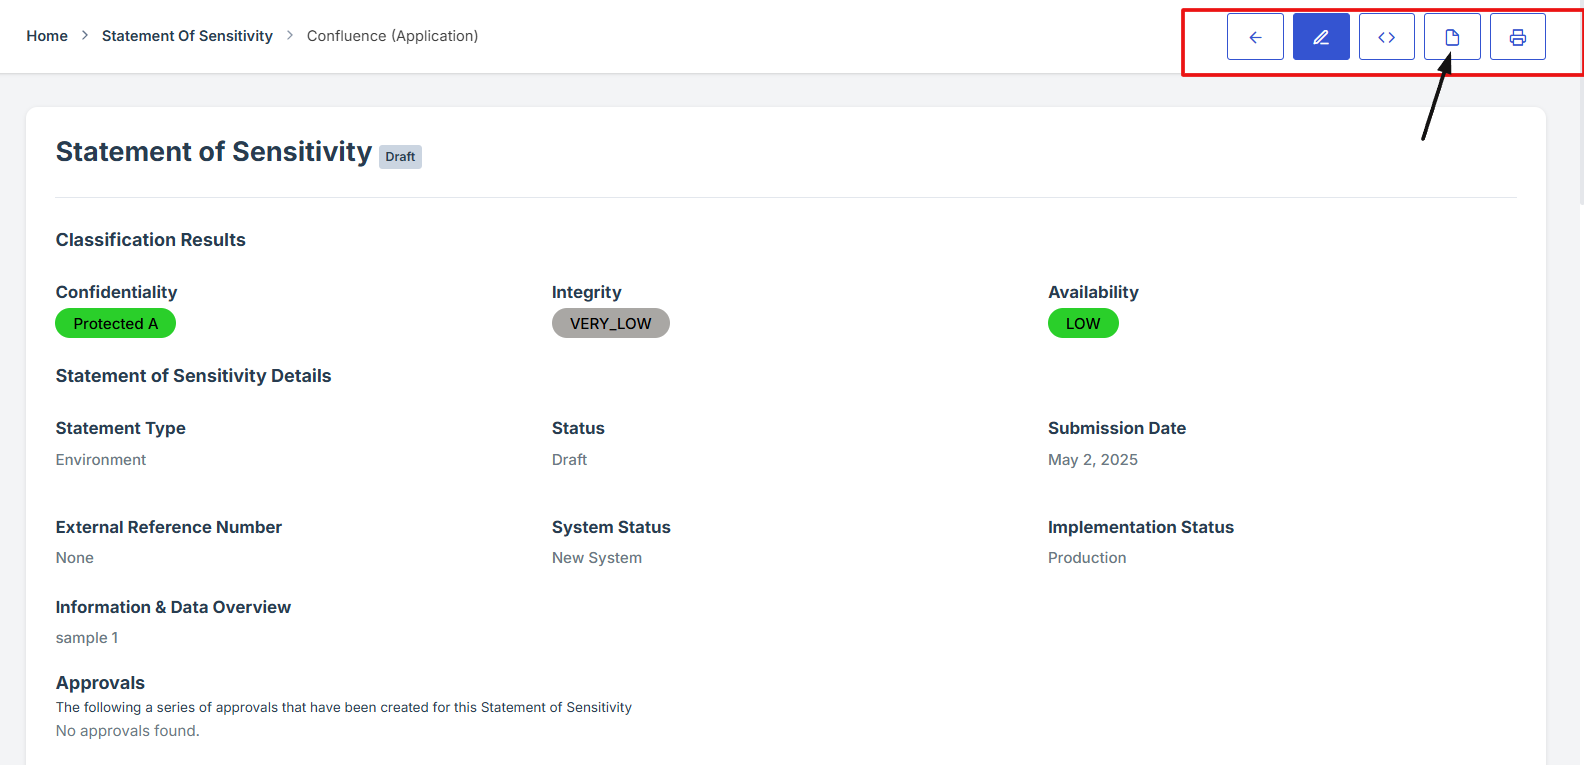
How To: Download Statement of Sensitivity Overview in PDF format
- Log in to Iron fort: How To: Login
- Locate and click the Statement of Sensitivity tab on the dashboard.
- Under the Statement of Sensitivity page, click the “APM ID” to get to the overview page.
- On the top-right corner of the overview page, locate and click the PDF icon. This will download a copy of the Statement of Sensitivity overview details in PDF format.
- Note
1. Log in to Iron fort: How To: Login
2. Locate and click the Statement of Sensitivity tab on the dashboard.
3. Under the Statement of Sensitivity page, click the “APM ID” to get to the overview page.

4. On the top-right corner of the overview page, locate and click the PDF icon. This will download a copy of the Statement of Sensitivity overview details in PDF format.
5. Note
Note: Only users assigned as Security Reviewers have the permission to download the Statement of Sensitivity. If you are not a Security Reviewer, the download option will not be available.
-
How To: Print Statement of Sensitivity Details
- Log in to Iron fort: How To: Login
- Locate and click the Statement of Sensitivity tab on the dashboard.
- Under the Statement of Sensitivity page, click the “APM ID” to get to the overview page.
- On the top-right corner of the overview page, locate and click the Print icon. This will print a copy of the Statement of Sensitivity overview details.
- Note
1. Log in to Iron fort: How To: Login
2. Locate and click the Statement of Sensitivity tab on the dashboard.
3. Under the Statement of Sensitivity page, click the “APM ID” to get to the overview page.

4. On the top-right corner of the overview page, locate and click the Print icon. This will print a copy of the Statement of Sensitivity overview details.

5. Note
Note: Only users assigned as Security Reviewers/Business owner have the permission to print the Statement of Sensitivity. If you are not a Security Reviewer/Business owner, the print option will not be available.
-
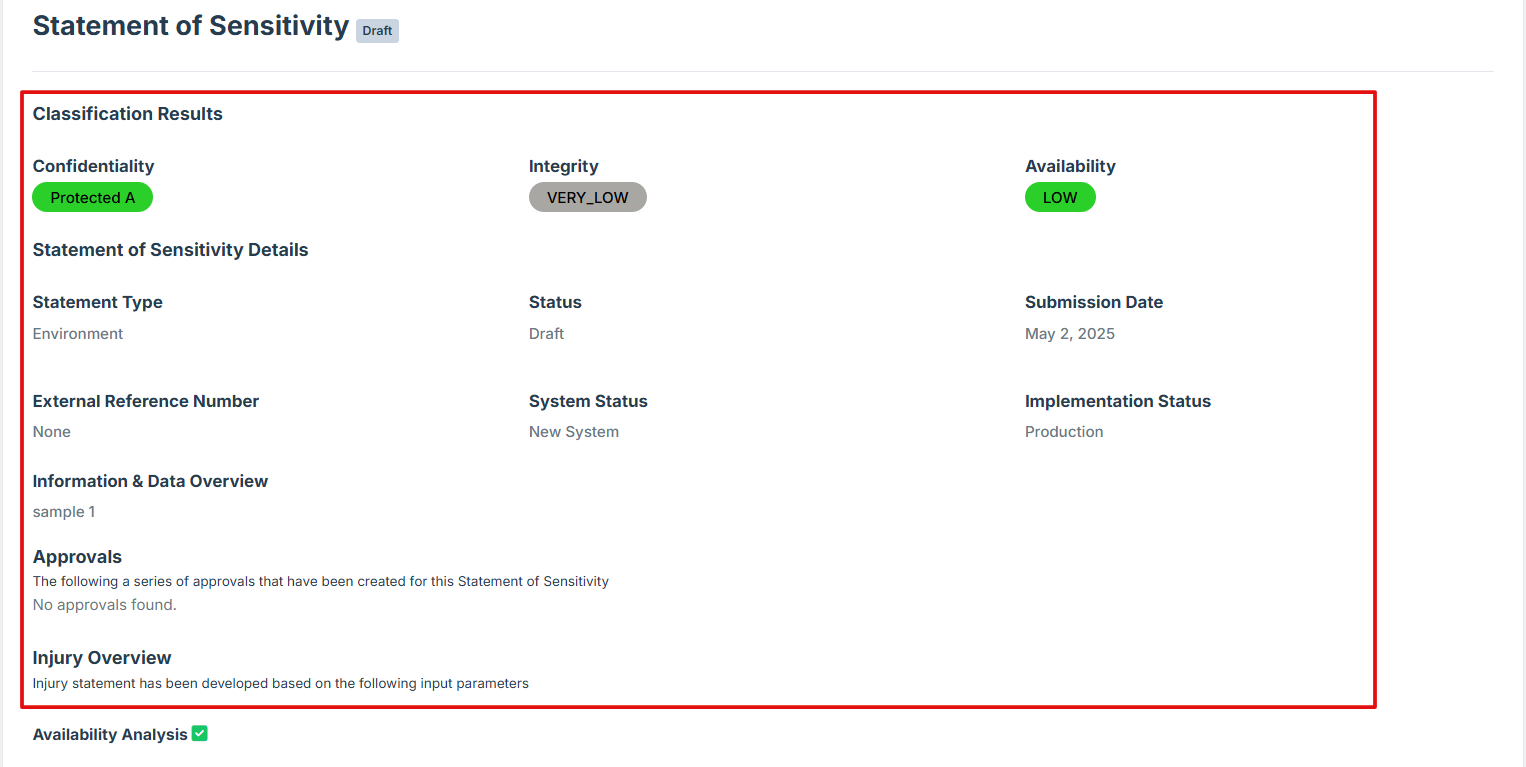
How To: View a Statement of Sensitivity Overview details
- Log in to Iron fort: How To: Login
- Locate and click the Statement of Sensitivity tab on the dashboard.
- Under the Statement of Sensitivity page, click the “APM ID” to get to the overview page.
- Once on the overview page, you'll see a summary section that provides key details about the Statement of Sensitivity.
- Note
1. Log in to Iron fort: How To: Login
2. Locate and click the Statement of Sensitivity tab on the dashboard.
3. Under the Statement of Sensitivity page, click the “APM ID” to get to the overview page.

4. Once on the overview page, you'll see a summary section that provides key details about the Statement of Sensitivity.
5. Note
Note: Only users assigned as Security Reviewers/Business owner have the permission to view the Statement of Sensitivity. If you are not a Security Reviewer/Business owner, the view option will not be available.
1. Log in to Iron fort: How To: Login
2. Locate and click the Statement of Sensitivity tab on the dashboard.
-
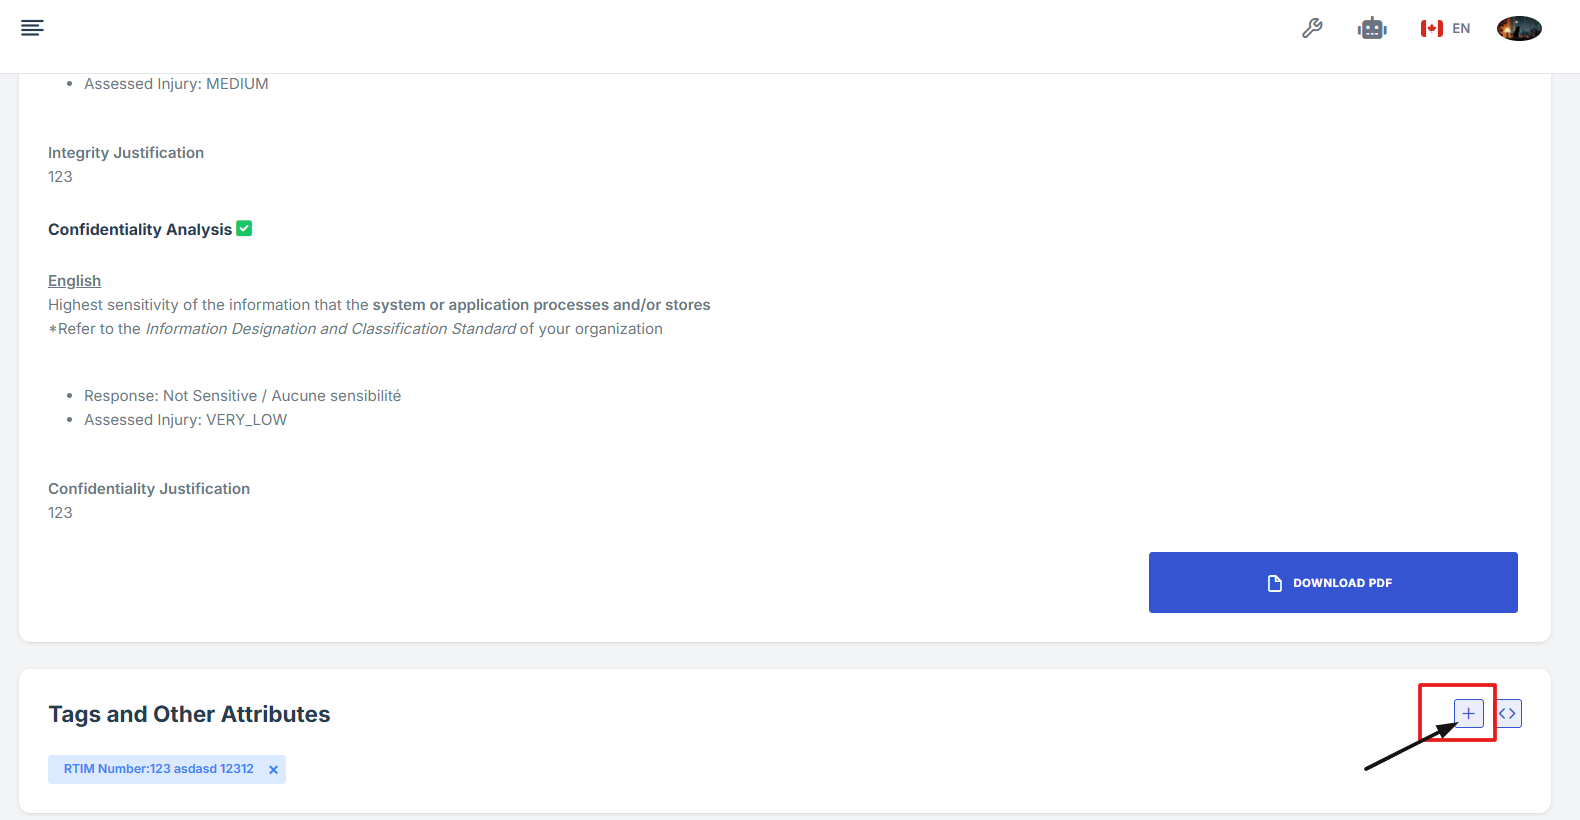
How To: Add Tag under Statement of Sensitivity
- Log in to Iron fort: How To: Login
- Locate and click the Statement of Sensitivity tab on the dashboard.
- On the Statement of Sensitivity list page, click on the APM ID of the record you want to edit. This will take you to the overview page.
- Scroll down the overview page until you find the "Tag" section.
- In the Tag section, fill in the required fields:
- Once all required fields are completed, click "Submit" to save the new tag.
1. Log in to Iron fort: How To: Login
2. Locate and click the Statement of Sensitivity tab on the dashboard.
3. On the Statement of Sensitivity list page, click on the APM ID of the record you want to edit. This will take you to the overview page.

4. Scroll down the overview page until you find the "Tag" section.
5. In the Tag section, fill in the required fields:
-
Key: Enter the tag's name or identifier.
-
Value: Provide the corresponding value for the key.